Posted on 4 Comments

Choosing a Deity for Family life

Nitai Gaur deities sita's lords raised arms chanting and dancing deities beautifully dressed and decorated with flowers and wigs

Firstly you may already have a preference, for metal, marble, wood or resin.

I would like to acknowledge first off that for the point of clarity I will be calling them metal/wood/etc deities but the material element never defines the Lord! Please in general practice do not refer to the deity as a “metal Krishna” etc, as this is both not respectful nor accurate. As soon as the Lord accepts your worship in the form then that form immediately becomes transcendental.

This article is to help you select the most practical form for worship in your particular household situation, and will draw on my experience in painting, caring for and worshiping a variety of deities.

  • Who will be caring for the Lord?
  • Will you be transporting the Lord frequently?
  • Is size a consideration?
  • Are you/your family members more drawn to certain materials?

Before you start, ask yourself this:

Do you have small children?

Are you planning to have small children assist with caring for the deity?

home deity worship child cares for bathing of krishna deity

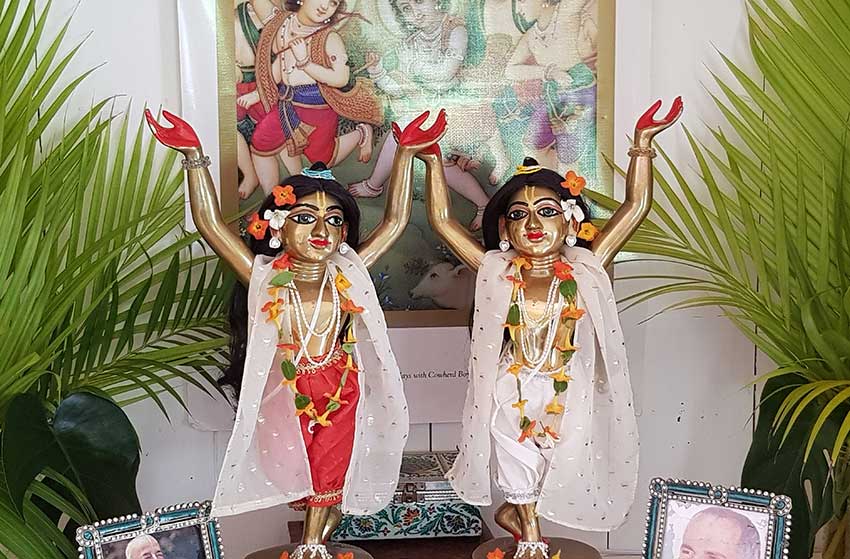
In our home, my daughter received Krishna & Balaram at age 4, and we chose metal Krishna and Balaram forms, two beautiful cowherd boys, with practical selection of metal so that they could withstand if they were accidentally knocked or tipped over, and able to be bathed and dressed as desired.

The practicalities of having deity worship with children should be considered – will your children jostle and fight over who gets to assist, and potentially knock the deity, or are they very well trained and respectful, or older?

In most instances I would suggest that families who want to involve children in deity worship should select forms of a mixed metal substance. Such forms are not easily damaged, moved, jostled etc, and while we train our kids to be respectful, unfortunately in enthusiasm or an excess of excitement little accidents can occur.

If you don’t want your heart to leap into your throat everytime your child or children approach the deity I heartily recommend you select a metal form.

Easy to buy ready to wear deity jewellery
Gaur Nitai with beautiful simple pearls – bought as a simple strand and tied. no DIY required.

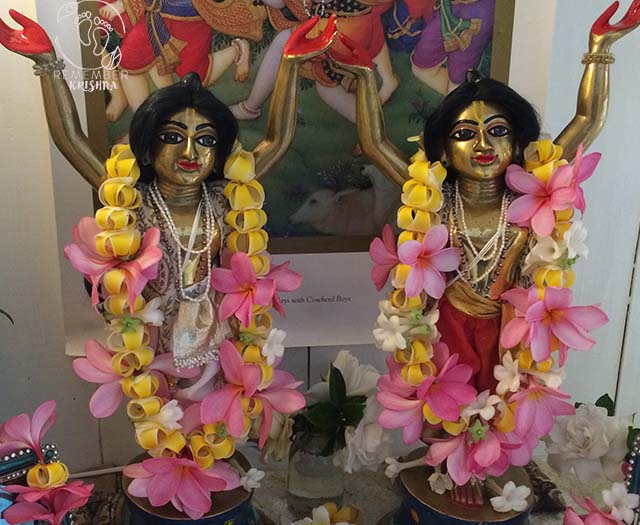
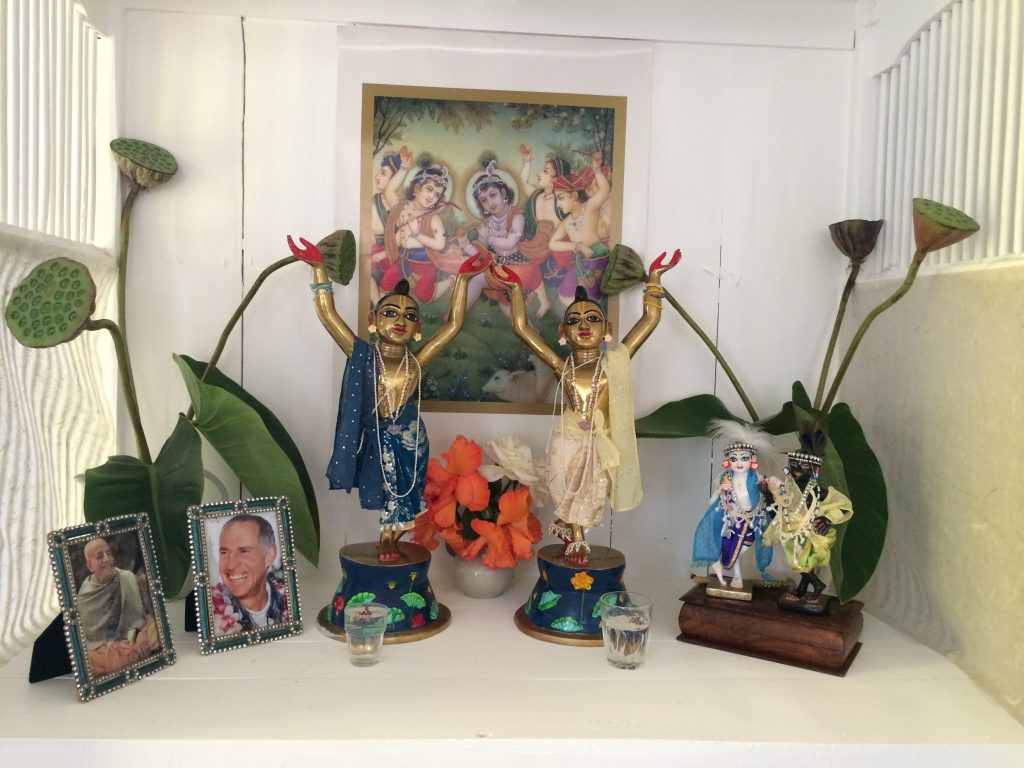
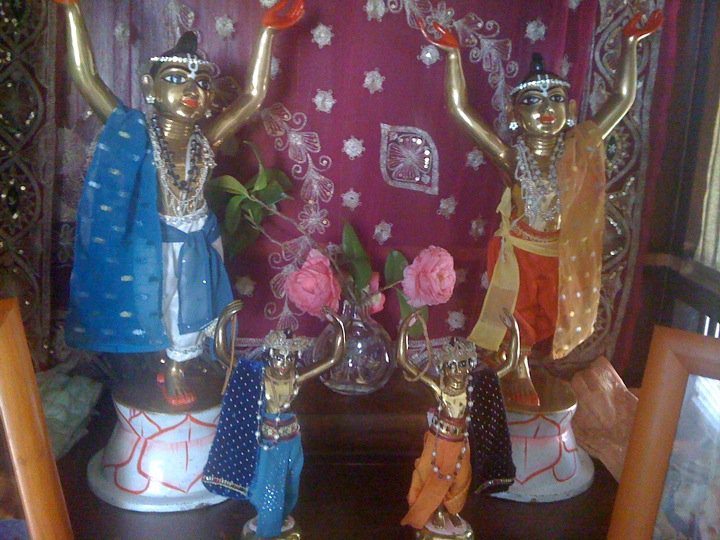
With great joy we have the delight of serving Nitai Gaur deities whose forms are mixed metal, with lovely large solid bases, and a size of 21″ (4 inches of which is their large circular base). Our deities have been cared for lovingly by children since baby age, and have never once been knocked or fallen over or sustained any other sort of indignity which could potentially occur with smaller deities or less stable deities.

nitai gaur deities in two sizes, small gaura nitai large nitai gaur deities both beautiful
You can see my 21″ deities and mums 7″ deities

My dear mother has charmingly delicate and petite metal deities of Gaur Nitai, and while they are robustly metal in form, they are more precarious and difficult to take care of, because of their smaller size and less stability. Her deities are approx 7 inches tall and so adorable!

https://www.instagram.com/p/BjqTzV9g5RZ/?utm_source=ig_web_copy_link

Growing up with her beautiful Lords – their small size and bases meant that she was quite protective, and until we were over 10, we were assistants at the dressing of the Lords only, allowed to put on a necklace here or there, or pour their bath water, but in dressing they are more vulnerable to tipping.

It worked in our family – instead of dressing the Lords, we all got the chance to offer arotik & be the pujari, or to read the story and sometimes lead some kirtan.

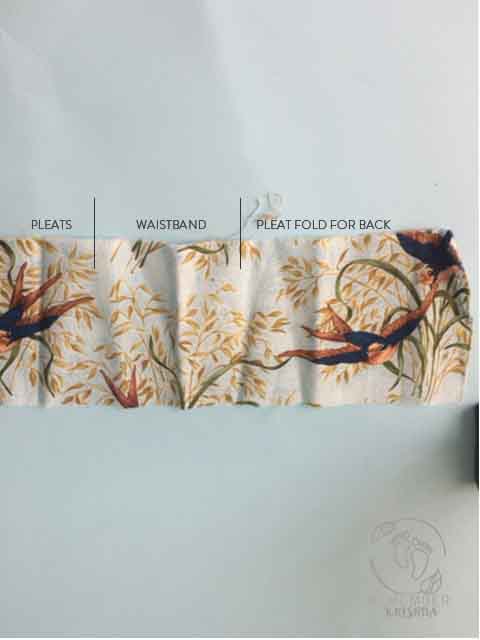
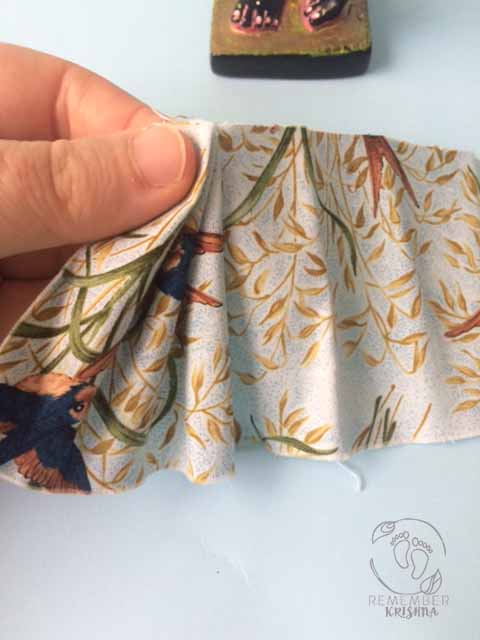
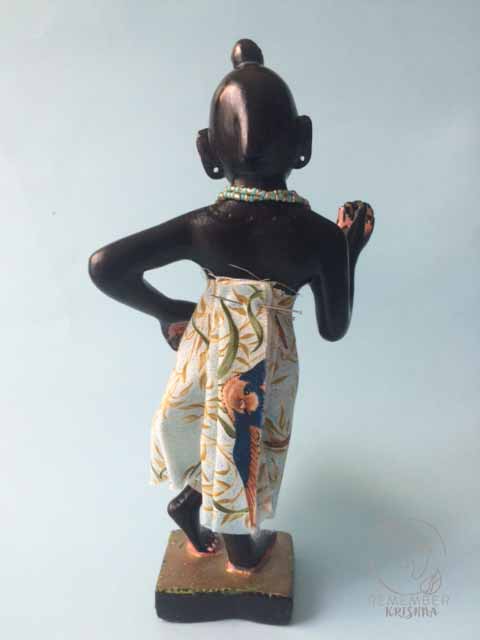
As a side note – it’s easier to make clothes for larger forms!

Is Size a consideration?

There are advantages and drawbacks to small and large forms, and you must weigh each one careful and consider what best works for your situation.

When you are weighing the advantages vs the disadvantages you may consider the following:

SMALL Forms

  • more transportable, lightweight for the weak
  • harder to see from a distance or close when your eyes get bad!
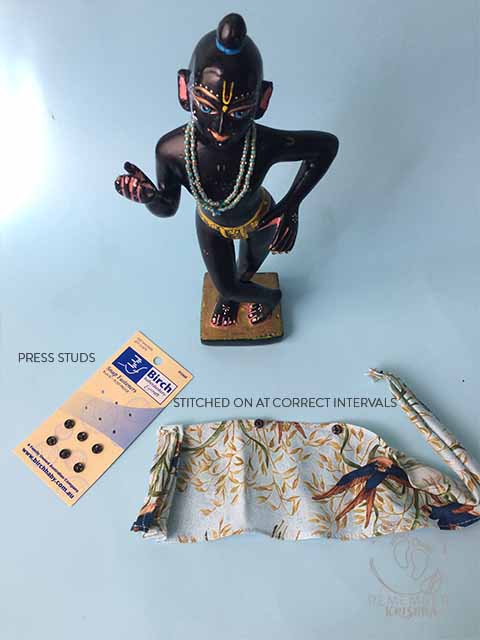
  • less fabric to dress, but much more fiddly to sew for
  • smaller deities = smaller altar

Large forms

  • stable not easy to knock over
  • heavier to transport, or lift
  • easy to feast your old eyes on and see from distances
  • costlier to dress in fabric and braid and trims
  • easier to sew for
  • larger deities = larger altar

You can find small and delicate metal moorti of both Nitai Gaur, Krishna, with varying degrees of refinement

Do you intend to travel with your deity or deities?

This is particularly important in the selection of your murti form.

Whether you have Nitai Gaura deities, Krishna deity, Radha Krishna deity or a deity of some other form of the lord, I encourage you to consider whether you will attempt to bring your deity with you if travelling.

There are many different sized forms available, and if you are travelling then I would encourage you still, that metal is very durable, although heavier. Wood could get caught up in customs! Plaster or resin is more fragile, and marble is the most fragile!

I currently have in my care a particularly fine pair of metal Radha and Krishna murtis (at approximately 6 inches tall) who would be extremely easy to carry travelling *side note!

Travel with Lords in hand luggage.

You would not want to lose them should any luggage go astray!

https://www.instagram.com/p/B1k_vpkAwqQ/?utm_source=ig_web_copy_link
Travelling with Krishna

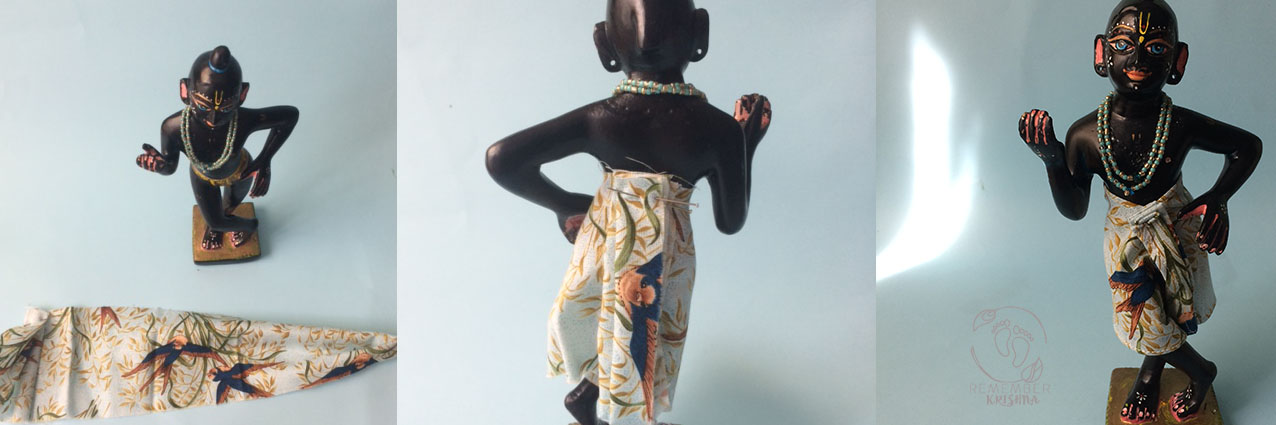
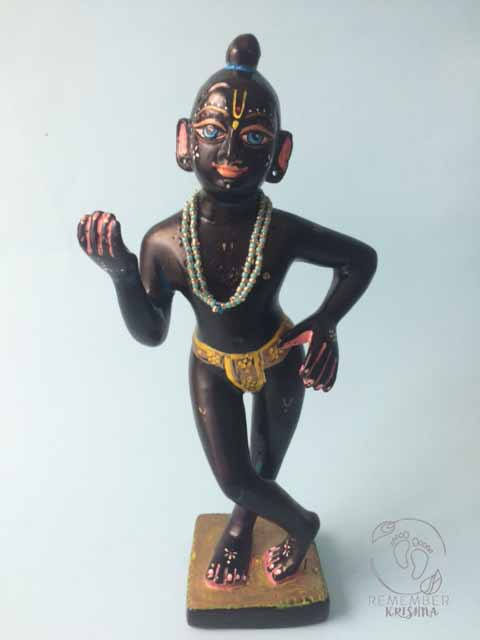
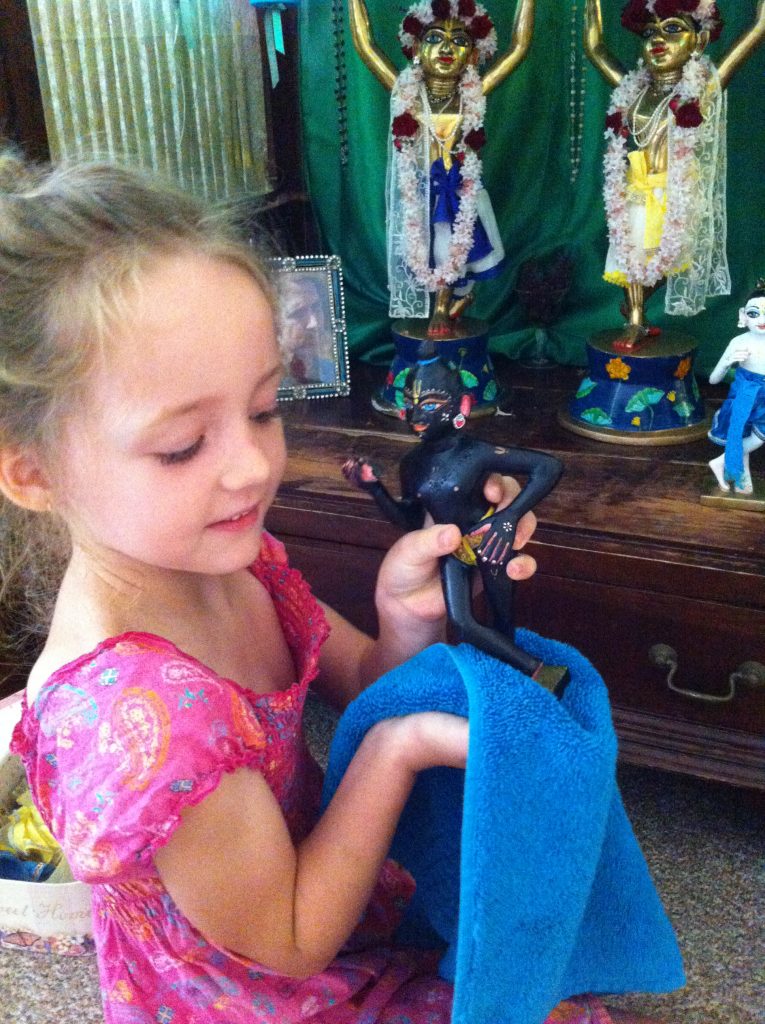
In preaching work, this beautiful dark Syamasundar Krishna is always travelling. He has a lovely travelling case! It is a converted make up box. It’s gold, which is fitting! We lined it beautifully with fabric and it contains some essential outfits and accessories, and He travels first class by air 🙂

Ashadhatu weight can be an advantage – making the statues very stable.

You have the option to select ashadhatu forms which are a mix of 7 or more metals, including lead and traditionally these deities are much heavier than the other forms of metal based statue available.

Do you need Ashadhatu deities? NO! Gosh no. While it is very nice to have them, as they are created carefully and lovingly – it is unnecessary. The Lord can accept whatever deity form He desires. I would liken it to offering Him ceramic or brass bowls to eat from… or ruby studded. There is no problem, but it is not a requirement. Offer with love and He will accept with great love and affection.

Some years ago, a sweet friend of mine allowed me to help her with selecting and ordering (Ashatdhatu) Gaura Nitai statues for her home worship. She also received Krishna/Balaram forms. Having two rambunctious young boys (toddlers at the time), she wisely chose to have metal forms of the Lord and is now comfortably able to allow her enthusiastic helpers to assist with caring for their Lordships.

Marble statues are fragile first

Conversely it has been to my dismay that friends with marble forms have had incidents where simply a table has been bumped, and the statue has fallen over and broken. Oh the heartache! With the best intentions in the world, this can happen.

https://www.instagram.com/tv/B2dL3EFATIy/?utm_source=ig_web_copy_link

My own sister had a first Marble form of Krishna ready to install and worship, and in the very first week of receiving the statue, prior to installation, the form was standing on a table which was bumped, and the form fell and broke!! Only imagine!

She persevered, and ordered another Krishna statue carved which is now sacrosanct and NO ONE but her is allowed to come near Him, touch Him or handle Him.

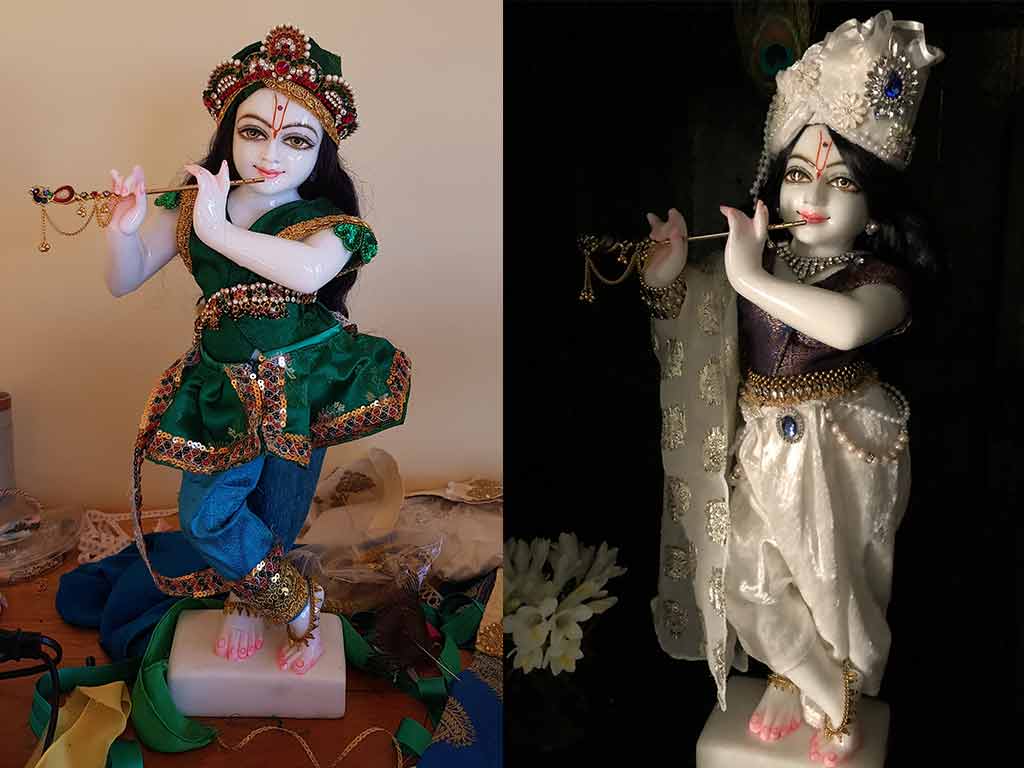
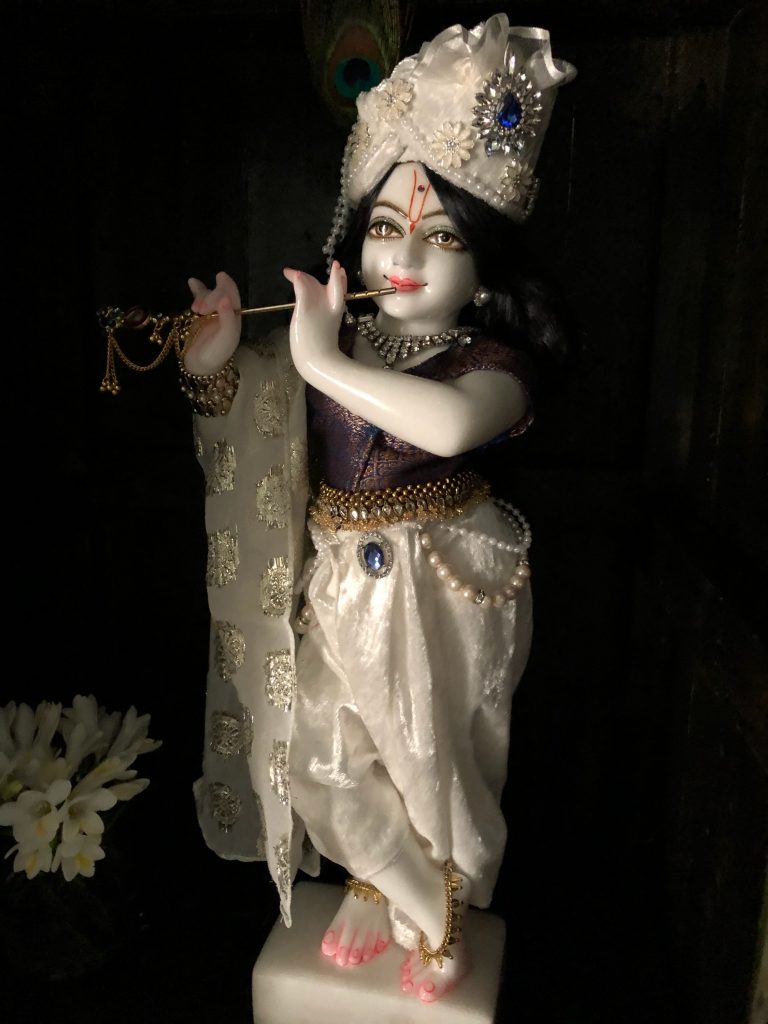
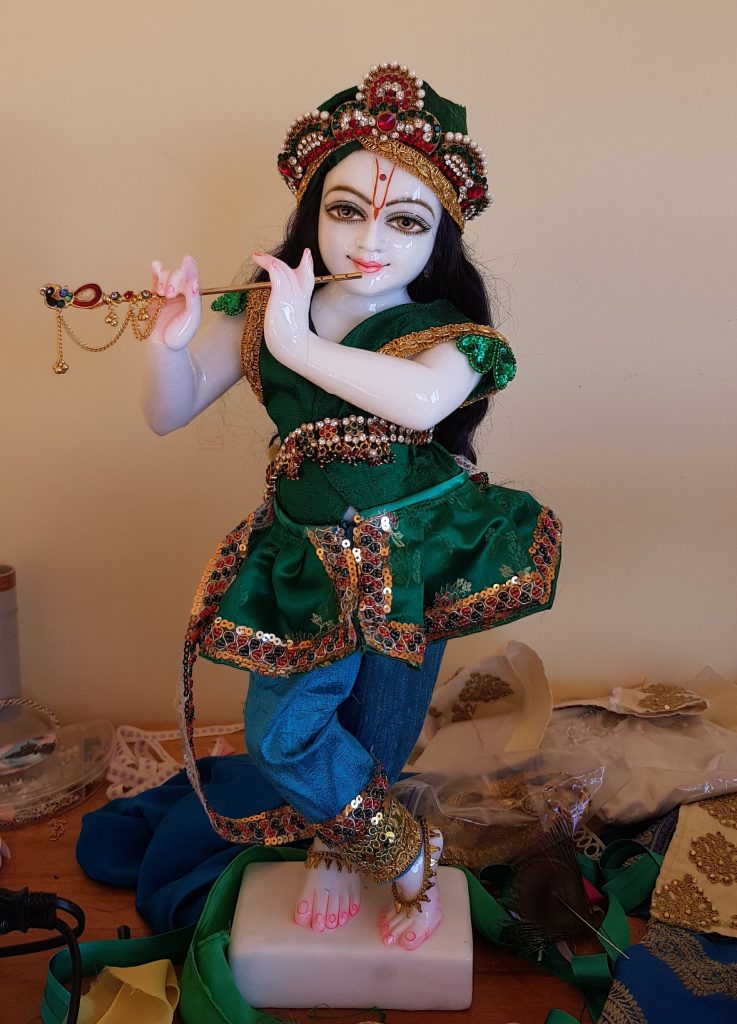
I have Him visiting our home right now! (ok she made an exception for me) but I cannot allow my daughter to assist even with placing His flute because my heart trembles everytime anyone else approaches. I nearly died of a heart attack last night when my daughter told me she was moving the altar and rearranging the living room (gasp!) That was promptly stopped!

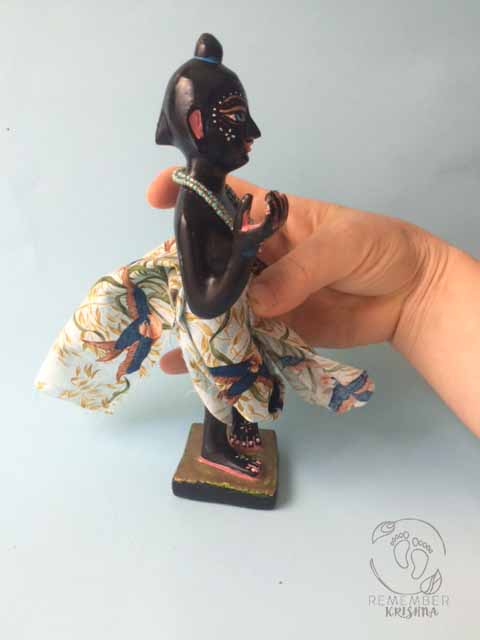
If you are interested in seeing him, here’s a sneak peek at His charmingness as He graces our home…

Radha’s Krishna visits Sita’s home!

For guidance on how to care for Krishna deities once you have invited Him to your home I would like to suggest you view this excellent series of videos from lovely qualified Vaishnava devotee of Krishna who has much more spiritual understanding and authority than myself.

If there are any mistakes or inconsistencies or incorrect conclusions in my blog post, I humbly request that you overlook them, and be assured that my intention in writing this article is only to offer helpful advice in the practicalities of selecting a form to worship in your home.

From my heart,

Sita dasi

Posted on

Sewing for Sweet Krishna

krishnas temple wearing green and white velvet

There were a number of things that made this time wonderfully exciting for me, and I have SO MANY pictures I feel I could do at least 6 blog posts to cover them all! Only- I don’t think I will, so I might just tell you all about how KRISHNA CAME- CONQUERED – LEFT!

He first arrived to visit in January 2018, and due to a series of unexpected events (all of exciting nature – like, the Hawaiian floods, then volcanoes, then unexpected disappearances in the family, and great moves across the continent!) He ended up staying with me for 8 glorious months of dedicated sewing time, having Him RIGHT HERE for fittings, sitting at my table and available to be closely measured and doted on.

Instagram was full of my different WIP clothes for Krishna, and every weekend was a speed sewing fest. I think I’ve been too busy to focus on anything else! Actually, I lured my sister into leaving Krishna with me, when she dashed home in March, by promising 10 complete outfits with turbans, and not to do anything else until they were done! It was tricky, I had a few distractions, but I MADE IT! 10 beautiful outfits for Krsna, in 3 weeks. Ok maybe more like in 8 months, but by now I have capped the Krishna wardrobe collection, running on to more like… 16? I have to count!


We had a lot of fun naming the outfits creatively!
This is His outfit list:

Lotus (definately one of the favorite outfits!)

Mango Lion;

this one was made thinking about Lord Nrsringadev, with more of a shako style turban for Krishna. It’s an interesting and functional outfit where you can remove that floaty orange silk overskirt, and style it more simply with just the vest, pants and shawl.

https://www.instagram.com/p/BiImERzACv4/?utm_source=ig_web_copy_link
MANGO LION OUTFIT

Purple Majesty

This outfit, such a hit! The purple is one of her favorite colors, and purple and gold = sensational. The Blue and the Purple are almost the same in style, with the puffy pant and the overskirt, top, topped with big turban.

They’re both super majestic and formal and a bit dancey.

https://www.instagram.com/p/Bh2N12bA6tg/?utm_source=ig_web_copy_link
Purple Majesty

Turquoise Lake – this first blue one is the Turquoise lake… it has a matching blue overskirt too.

https://www.instagram.com/p/BitEy1HAFxz/?utm_source=ig_web_copy_link

Green & White freshness

One of my earlier efforts, before I went all out lavish after a bit more direction from my sister toward “mathura prince Krishna style”.

It’s still got that glorious dhoti, and the nice useful vest which will probably be great in the changing seasons weather, like the Autumn coolness or unpredictability of Spring.

https://www.instagram.com/p/BhSJaiXjha6/?utm_source=ig_web_copy_link
GREEN AND WHITE OUTFIT

Majestic Prince (the turban for this outfit is my sisters favorite turban – it’s also the biggest and most full on ornamented!)

Honestly I struggled a LOT with this outfit! I made the maroon velvet top, which I think veers towards luscious velvet bathrobe. And pairing it with YELLOW was such a hard choice but it’s so INDIAN I think, and super authentic. The Turban just kept getting bigger and bigger! Still, it’s one of my sisters favorites, she confided.

https://www.instagram.com/p/BiquLULATfT/?utm_source=ig_web_copy_link
This outfit is called MAJESTIC PRINCE

Rose Red

Gasp! Stunning.

Royal Red coat and oriental dhoti

so cute, this coat is made from heavy braid, and topped with a soft silk shirt and a fair bit of braid.
The braid was donated by MadyaLila from Ashraya! It’s the extra’s for one of her Ashraya outfits, so as she told me delightfully, she’s so happy to be twinning with Krishna!

https://www.instagram.com/p/BhplEgogxJX/?utm_source=ig_web_copy_link
ROYAL RED COAT
https://www.instagram.com/p/Bee0kv9DKkx/?utm_source=ig_web_copy_link
Royal Red IN PROGRESS

Bathing outfit – Krishna’s swimming gear, named so because it’s simplicity and pastel colors

https://www.instagram.com/p/BhiaCAzgkI7/?utm_source=ig_web_copy_link
BATHING OUTFIT
https://www.instagram.com/p/Bhh6abQA6rD/?utm_source=ig_web_copy_link
BATHING OUTFIT

Royal Blue – can’t find a photo, but it’s a vest and royal blue dhoti. I’ll try and add a picture later!

Emerald – the most incredible dhoti with reams of expensive gold braid, decorated in pearls!

Now he has hair though, the crown doesn’t fit. The simplicity of this is just to my taste!

https://www.instagram.com/p/BgLGu_1HKdo/?utm_source=ig_web_copy_link
EMERALD OUTFIT
https://www.instagram.com/p/BiGgNeDAY8g/?utm_source=ig_web_copy_link

Balaram Lustre

Balaram Lustre outfit started out with this pristine white velvet, and the concept of a rolled side turban with that higher on one side Rajput Princely style element. It came out REALLY NICELY, I felt, but I did warm up all the white with some blue vest.

I’m particularly keen on the pearl drop elements at His beautiful waist.

https://www.instagram.com/p/BkKt6A9gxG3/?utm_source=ig_web_copy_link
BALARAM LUSTRE

Peacock Outfit

This beautiful outfit has the best set of pants, they’re the final product after 4 attempts at pants, I think I finally made the best type for Him.

They are made from a blue shantung silk, and the outfit has a matching oriental green skirt, with a green silk fitted top. I have also paired it with a high waist belt, as you sometimes see in ancient Indian paintings and sculptures. LOVE IT!

Forest prince Peacock outfit - shantung blue silk pants for Krishna deity, Green oriental silk overskirt, ornate braidwork and forest green shantung silk vest. Krishna deity wears a crown of opulent red green and pearl gems.

Fresh forest flowers – this one is a rejected outfit… I made it, I like it, but it’s not been popular due to the large flowery print, and so it’s one I’m keeping here to model off SIZES. To me it’s very Rajput. And I love it.

https://www.instagram.com/p/BkhuEyQA18m/?utm_source=ig_web_copy_link

Love, Sita

Posted on 5 Comments

DIY dhoti garment for Krsna deity

there are lots of different styles of deity garments (of course for different deities too! Krsna & Radha /Krsna Balaram/ Gaur’s Nitai/ Jaganath deities.. this tutorial is for a pleated dhoti which passes between the legs to secure at the back of the waistband. You’ll need to make sure that your deities have enough gap between their legs to pass up the back pleat of the dhoti.

Krsna-diy-tutorial-dhoti Krsna
Deity form needs gap between legs to pass up dhoti back pleat

I really hope that this tutorial will assist you in making your own deity garments. It is geared at beginners who have some sewing experience, as I don’t think I’m practical enough to do a tutorial while I teach you to sew! I’m personally fairly disorganized and love to have a pattern to copy, I don’t think I even have my deities measurements written down anywhere because I always have a big overflowing basket of their laundry I can just pull a sample garment from, and I have my favorites.

You can watch a few more DIY tips if you want some ideas about the various methods I use to create this simple dhoti pattern. View here.

There’s so many styles and they all give such a different vibe! People have preferences for different lengths/ fabrics/ you name it! Right now I love lots of summery bright colors, simple braids, and abundant fresh flowers. In summer time I have some nice just below the knee length dhoti for my Nitai Gaur deities, but they also have some longer just above the ankle length dhotis.

Making garments for your deities is such an adventure. Most of the early sets I made for my deities prior to installation I no longer dress them in – lately their garments are uber-simple, sometimes even without braid, simple, cool, and so comfortable to wear. Always, always easy to dance in!

Remember you are making these clothes for their pleasure, so even your humble attempts, if not perfect, will be a nice start.

Offer your Lords a mirror to enjoy their own beautiful reflection after you have dressed them 🙂

Before you start:

  • Measure!  You’ll need to measure you deities waist or hip (where you want the dhoti to sit) . Measure the hip to ankle – choose your length at this point.  (You can go anywhere from knee length to ankle).
  • Ok so you have measured, now you can select your fabric
    & I’d like to offer some words of wisdom here: I use mostly fine silk (silk charmeuse) or sometimes very nice polyester or cotton fabric. I’ll do another post on fabric types some other time, but for now please try your first dhoti garment in this style using a very light fine fabric so it drapes nicely and is not difficult to sew. For this tutorial I am using a light-weight cotton, such a pretty print!
  • You might like to make a sample dhoti first, to save special fabric for when you have worked out the perfect sizing. This is a very non-scary way to proceed, especially if you have bought a silk fabric which averages around $20 a metre!

Ready to start:


deity garments, deity clothes, krishna krsna deity
Select suitable fabric, cut with seam allowance

krsna-deity-dhoti
pleat a fine set of pleats in the front, to see how much pleat allowance you will have, on top of your waist measurement

diy krsna deity clothes deity garments krishna craft tutorial
Judicious use of pins while you work out the appropriate length

krishna deity garments diy tutorial
Test on Krsna remove the excess fabric which is not needed to make the pleat at back

krsna dhoti deity garment pattern tutorial diy

Back pleats will look like this, and will have a press stud attached to secure

Cutting out your pattern – So generally the overall waistband length will be 1.5 x the waist band length. Allow extra pleats in the front and don’t count on them as part of your waist band measurement. This can vary depending on the curviness of your Lord. If you have your deities right in front of you then that is the easiest way to do it.  Sometimes you may need to add in a pleat to the back to allow for a curvy hip on Krsna or Nitai Gaura deities.


Hem your basic rectangle. I like to use my miracle foot, the seam it gives is as fine as a hand rolled seam could be.

Add on your braid. You may wish to have braid simply down the front, or around the hem. Consider that if the braid is very think it may interfere with the way the fabric hangs.  You can handsew or machine sew the braid dependent on the amount of beadwork on the braid or other factors like time. In general they sit best if hand-stitched but I often sew them on, after accounting for the affect the braid will have on the pleating or the folds of the cloth.


I learned this the hard way!

Note where the pleat side is – it shouldn’t be on the crossed leg it should be on the straight leg side.

Stitch your pleats down, I like to make them fine and stack them in the front, with three pleats.

For fastners, you have a choice – you can either use Velcro (it’s SO easy to put them off and on with velcro and also allows for some room, you can adjust the tightness a little bit, but it will pull the silk if you are using silk, and if you aren’t super organised in your deity garment care it can pull other elements like shawls or other dhoti.  The other option is to use snap fastners – they sell varying sizes of these, and depending on the weight of your fabric you will chose the appropriate size. They’re very time consuming to stitch down, sometimes it takes me just as long to sew on the snaps as hemming and putting together the whole dhoti! Still, they’re long lasting and they won’t damage any garments.

You’ll need to have fastners at the waistband, and one in the middle of the waistband at the back and on the pleat that passes between the legs and snaps on at the back.

Completed Krsna dhoti!
You can tuck the pleats between his legs a little. On the deity, please create the pleat on the leg which will be straight, so that it can tuck tidily between his legs and the other crossed leg has the section which will pass between his legs and up the back to pin at the back.

things to be careful of:

  1. position your press studs in the right spots like don’t get confused on the inside & outside – if you check the end of the video you’ll notice I stitched the button on the back pleat on the wrong side!
  2. Pleats! I can’t over emphasize this – pleat side should be on the straight leg so it can tuck between the bent leg on Krsna. It doesn’t matter so much on deities of Lord Chaitanya & Lord Nityananda, as their standing postures can vary.
  3. keep it easy! Use a rolled foot on the sewing machine to hem.
  4. Beading needles work best for stitching on the press studs

Dressed in His Breezy new dhoti