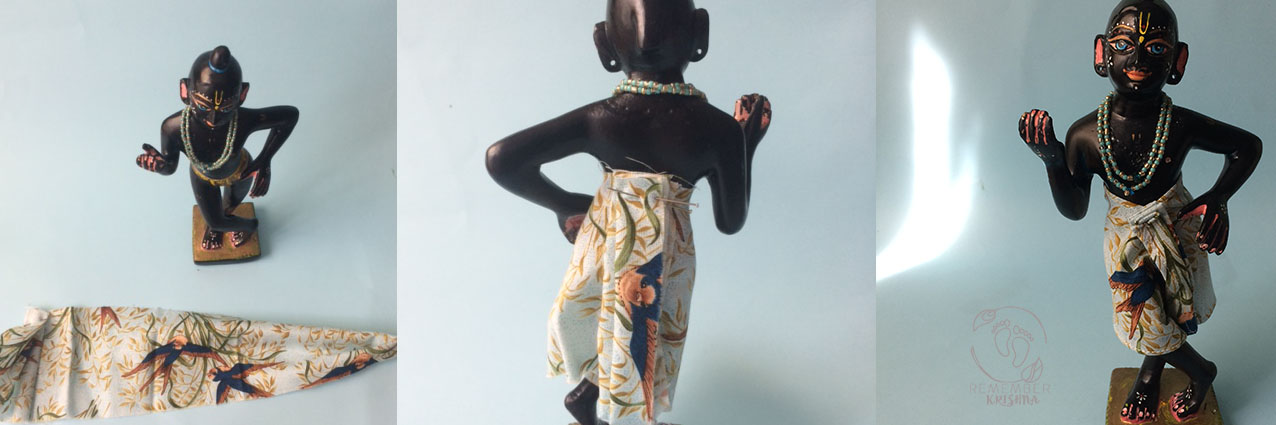
there are lots of different styles of deity garments (of course for different deities too! Krsna & Radha /Krsna Balaram/ Gaur’s Nitai/ Jaganath deities.. this tutorial is for a pleated dhoti which passes between the legs to secure at the back of the waistband. You’ll need to make sure that your deities have enough gap between their legs to pass up the back pleat of the dhoti.
I really hope that this tutorial will assist you in making your own deity garments. It is geared at beginners who have some sewing experience, as I don’t think I’m practical enough to do a tutorial while I teach you to sew! I’m personally fairly disorganized and love to have a pattern to copy, I don’t think I even have my deities measurements written down anywhere because I always have a big overflowing basket of their laundry I can just pull a sample garment from, and I have my favorites.
You can watch a few more DIY tips if you want some ideas about the various methods I use to create this simple dhoti pattern. View here.
There’s so many styles and they all give such a different vibe! People have preferences for different lengths/ fabrics/ you name it! Right now I love lots of summery bright colors, simple braids, and abundant fresh flowers. In summer time I have some nice just below the knee length dhoti for my Nitai Gaur deities, but they also have some longer just above the ankle length dhotis.
Making garments for your deities is such an adventure. Most of the early sets I made for my deities prior to installation I no longer dress them in – lately their garments are uber-simple, sometimes even without braid, simple, cool, and so comfortable to wear. Always, always easy to dance in!
Remember you are making these clothes for their pleasure, so even your humble attempts, if not perfect, will be a nice start.
Offer your Lords a mirror to enjoy their own beautiful reflection after you have dressed them 🙂
Before you start:
- Measure! You’ll need to measure you deities waist or hip (where you want the dhoti to sit) . Measure the hip to ankle – choose your length at this point. (You can go anywhere from knee length to ankle).
- Ok so you have measured, now you can select your fabric
& I’d like to offer some words of wisdom here: I use mostly fine silk (silk charmeuse) or sometimes very nice polyester or cotton fabric. I’ll do another post on fabric types some other time, but for now please try your first dhoti garment in this style using a very light fine fabric so it drapes nicely and is not difficult to sew. For this tutorial I am using a light-weight cotton, such a pretty print! - You might like to make a sample dhoti first, to save special fabric for when you have worked out the perfect sizing. This is a very non-scary way to proceed, especially if you have bought a silk fabric which averages around $20 a metre!
Ready to start:

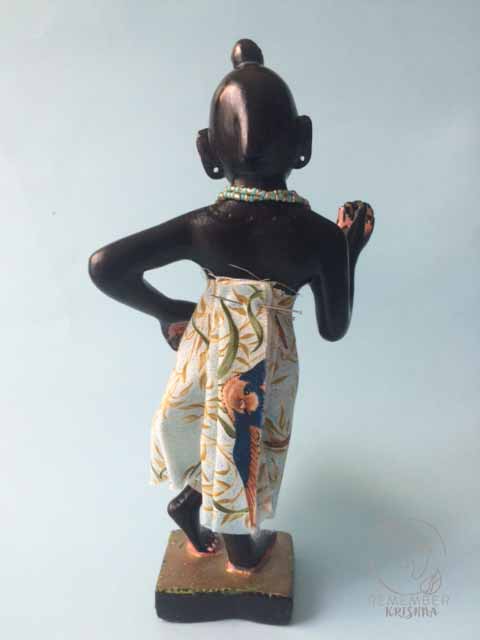
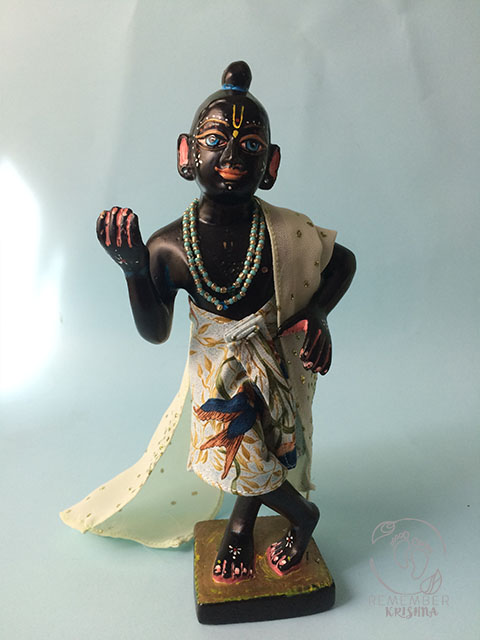
Back pleats will look like this, and will have a press stud attached to secure
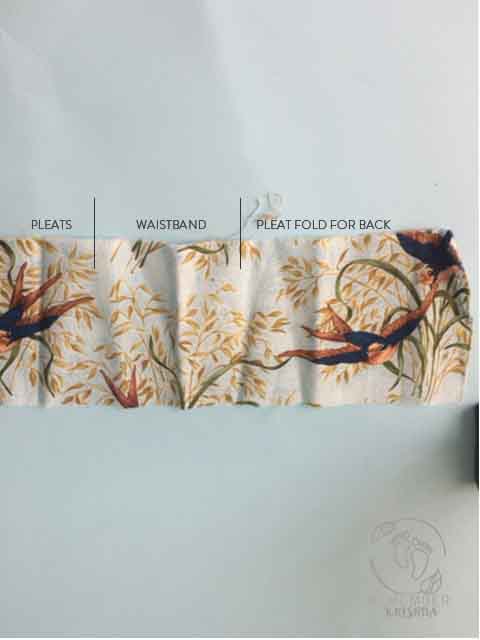
Cutting out your pattern – So generally the overall waistband length will be 1.5 x the waist band length. Allow extra pleats in the front and don’t count on them as part of your waist band measurement. This can vary depending on the curviness of your Lord. If you have your deities right in front of you then that is the easiest way to do it. Sometimes you may need to add in a pleat to the back to allow for a curvy hip on Krsna or Nitai Gaura deities.
Hem your basic rectangle. I like to use my miracle foot, the seam it gives is as fine as a hand rolled seam could be.
Add on your braid. You may wish to have braid simply down the front, or around the hem. Consider that if the braid is very think it may interfere with the way the fabric hangs. You can handsew or machine sew the braid dependent on the amount of beadwork on the braid or other factors like time. In general they sit best if hand-stitched but I often sew them on, after accounting for the affect the braid will have on the pleating or the folds of the cloth.
Note where the pleat side is – it shouldn’t be on the crossed leg it should be on the straight leg side.
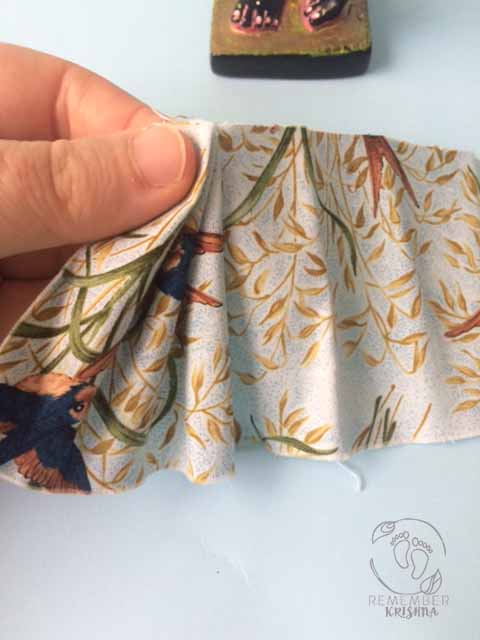
Stitch your pleats down, I like to make them fine and stack them in the front, with three pleats.
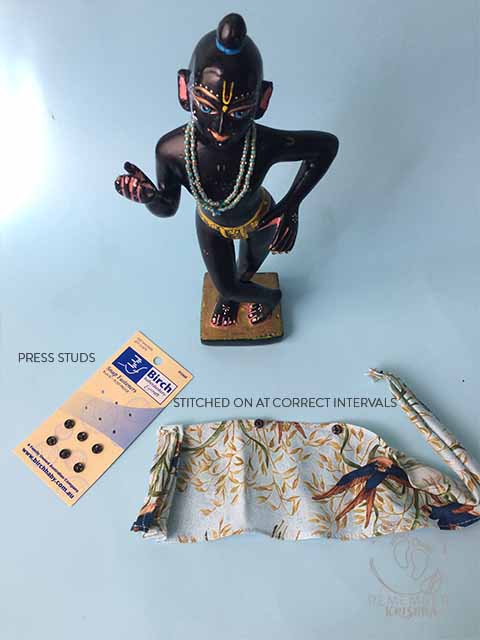
For fastners, you have a choice – you can either use Velcro (it’s SO easy to put them off and on with velcro and also allows for some room, you can adjust the tightness a little bit, but it will pull the silk if you are using silk, and if you aren’t super organised in your deity garment care it can pull other elements like shawls or other dhoti. The other option is to use snap fastners – they sell varying sizes of these, and depending on the weight of your fabric you will chose the appropriate size. They’re very time consuming to stitch down, sometimes it takes me just as long to sew on the snaps as hemming and putting together the whole dhoti! Still, they’re long lasting and they won’t damage any garments.
You’ll need to have fastners at the waistband, and one in the middle of the waistband at the back and on the pleat that passes between the legs and snaps on at the back.
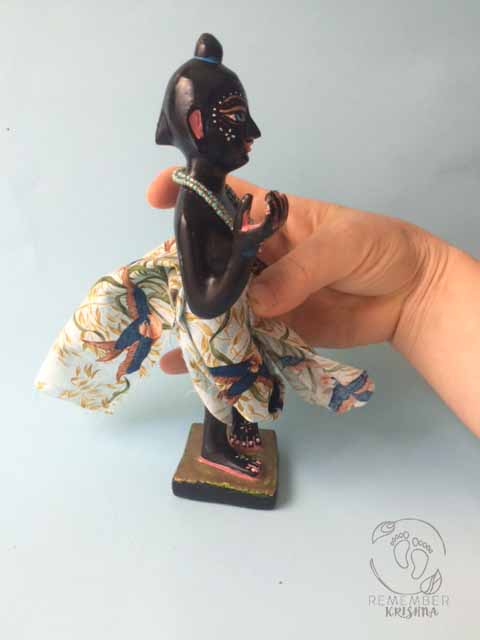
You can tuck the pleats between his legs a little. On the deity, please create the pleat on the leg which will be straight, so that it can tuck tidily between his legs and the other crossed leg has the section which will pass between his legs and up the back to pin at the back.
things to be careful of:
- position your press studs in the right spots like don’t get confused on the inside & outside – if you check the end of the video you’ll notice I stitched the button on the back pleat on the wrong side!
- Pleats! I can’t over emphasize this – pleat side should be on the straight leg so it can tuck between the bent leg on Krsna. It doesn’t matter so much on deities of Lord Chaitanya & Lord Nityananda, as their standing postures can vary.
- keep it easy! Use a rolled foot on the sewing machine to hem.
- Beading needles work best for stitching on the press studs
I am just starting to learn about all of this. Thanks!
namaste, haribol! thank you very much for this awesome tutorial. could you please create some more? it is very helpful!
Thank you so much for your comment Milena! I am indeed working on posting more of my DIY tutorials because I am delighted to be useful to the devotees of Krishna and share the little things I have learnt, borrowed, found.
I find that I am very inspired by the nice association of devotees similarly like-minded in deity worship and it’s just so exciting to share.
This is absolutely wonderful! Thank you so much for making this tutorial. I too have grown more and more fond of dressing my lords in the most simple dhotis and this tutorial looks perfect.
Surabhi thank you so much for your kind comments.
Hopefully yes, the tutorial is easy to follow!
I absolutely adore your blog, thank you for sharing a little glimpse into your world.