Posted on 22 Comments

Painting metal deity forms of Krishna, Nitai Gaura deities

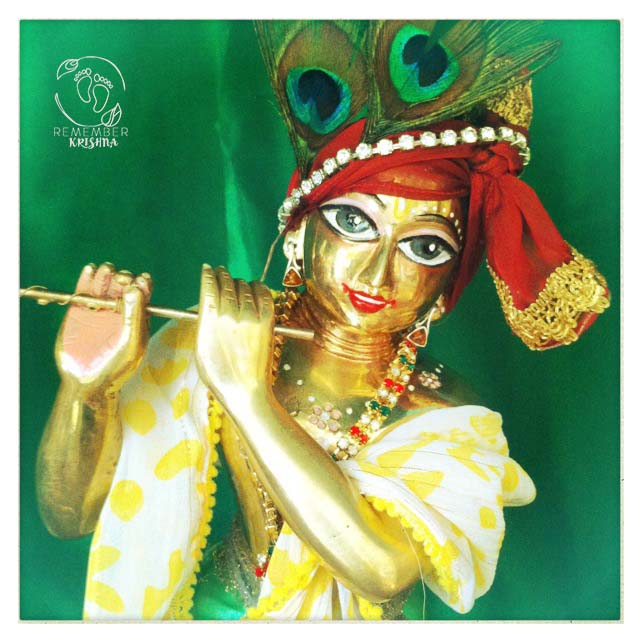
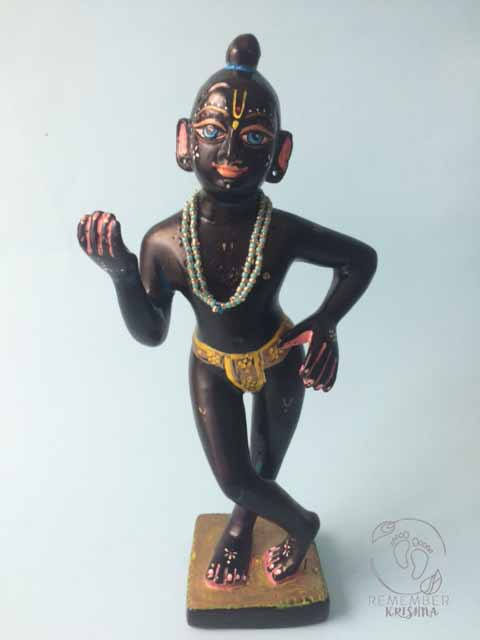
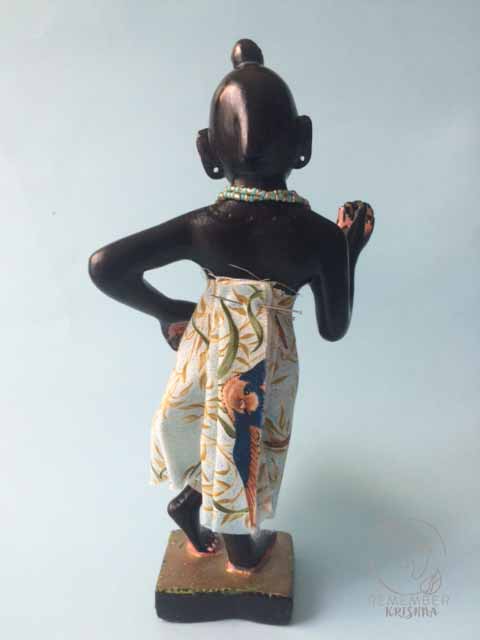
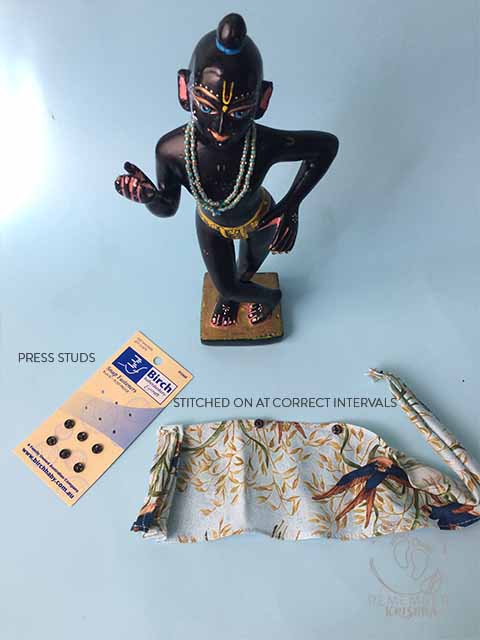
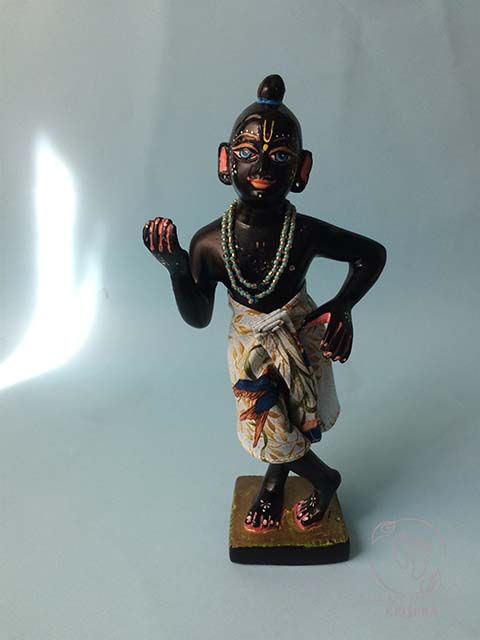
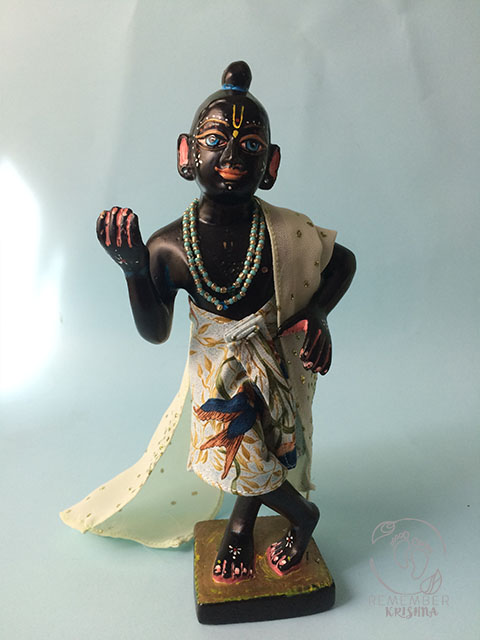
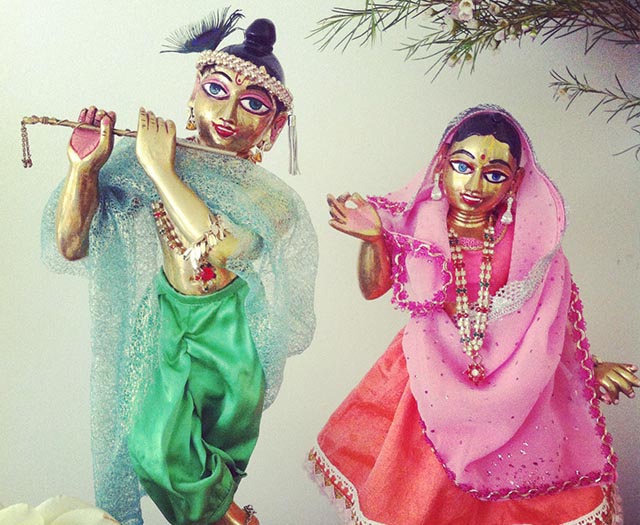
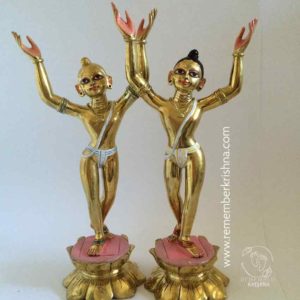
Brass or metal deities; guide to paints. What do you use to paint on metal murti?

The following paints have been tested on numerous deity forms (by me), and will be ideal for Ashtadhatu* deties (A combination of 8 metals) and will also work on marble deities as well as wood or resin deity forms.

You will need:

Enamel oil-based paints OR oil paints – see notes on where to purchase
Turpentine for brush clean up and thinning.
Fine brushes – .07 watercolor or acrylic brushes

deity paint in oils for metal murti krsna formsThe following basic colors:

White
Black
Red

Optional Extra colors which are nice to have:
Yellow
Gold/ bronze/ silver
Pink (you could mix own)
Blue
Green
Peach (mix from red and yellow/white)

Bathing Krsna deity – little laddhu Gopal

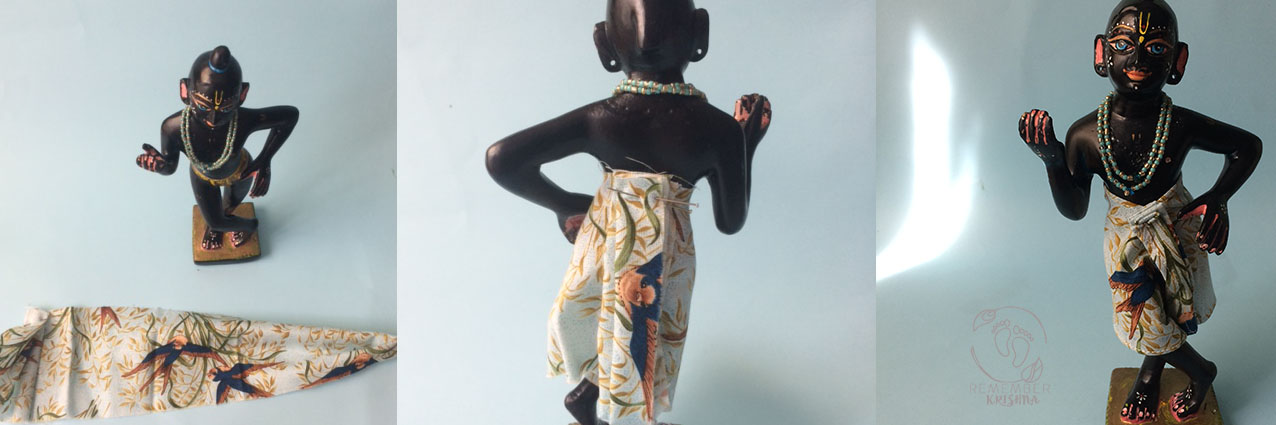
One off the charming benefits of metal archa vigraha forms is the potential for bathing the murti. So that you are able to do so, they need to be painted with water proof paint. Oil based enamel can withstand many years of daily bathing, although it is prone to chipping.  Oil paints are slightly tougher and if you have the patience to sit out the requisite drying time are ideal.

I’m not famous for my patience and generally use enamel which dry waiting 2 hours (each layer).

Oil based paints can take up to 8 weeks took dry but this depends on the thickness of the applied paint and the climate.  Dry climates will hasten the drying process.

A few random notes painting aesthetically:
If deities (metal/ brass combo) are a warm tone it can be complimentary to use a warm peachy tone for hands/eyelids/lips and feet.

paint gaurnitai deities
Warm tones suit the gold hue of metal Ashatdhatu deities.

When painting eyelids I suggest a gentle eye lids color, not bold, for a mellow look.  I never use a blue eyeshadow on lids, but will sometimes use it to indicate the lid crease.

See my future tutorial (coming soon) for painting deity eyes, and check out my guide to cleaning metal murti (coming soon).

*Ashtadhatu is a pleasing combination of metals including gold, silver, copper, lead, zinc, tin, iron and mercury that has been traditionally used for deity creation in India and is still used to this day.  While this author is not a Vedic scholar and cannot answer at this point to the benefits of mixing metals, modern scientists are extensively trialing different combination of metal alloys and state, interestingly, that
“At the atomic level, pure metals have a regular crystal structure that stacks layer upon layer of identical atoms. Often, these layers slip past each other easily, which makes the metal too soft to be useful. That is why pure gold is rarely used in jewellery: it cannot survive much wear and tear. But if a metalsmith mixes in an element with a different atomic size, the interloper will randomly disrupt the layers and reduce their tendency to slip, which creates a much harder alloy. The correct choice of compounds can enable metallurgists to tailor other properties as well, such as corrosion resistance or melting point.”

So it can be understood that deities created from this combination of metals will be superior, given their basis in Vedic history!  Nevertheless, Krishna is kind enough to accept worship even in a printed paper format, so don’t stress, we just thought it was a fun fact.

**You may have to hunt around to find where you can purchase mini enamel paints. Try hobby shops, or toy shops often sell enamel paints for model painting. You always have the option of ordering online. You can use the enamel house paints which are available from hardware stores but generally these are sold in larger containers than required, and you can end up spending more than you would need to. I can’t vouch for whether they are stronger or not.

Did you enjoy this post? Please leave me a comment and let me know!

Posted on Leave a comment

Easy vest DIY tutorial for Nitai Gaur or Krishna deities

gauranitai murti diy tutorial deity clothes

Summer is so easy! Just lovely breezy dhoti & nice light shawls. Once winter rolls around I start wishing I had more shirts for my dear Lords, so I have come up with a really simple shirt option.

This set is basically a sleeveless vest option and there are a variety of fabrics you can experiment with.

For this tutorial I used quite a flexible but heavy thai shot silk fabric (given to me by a very dear friend, thank you!).

I have also made longer looser versions in a sheer fabric which look really lovely on, they work really well and nicely, almost like flowy shawls.

The beauty of this pattern is it’s ease. It suits a beginner skill level, and there are no tricky sleeve insets in sight!

DIY sewing deity tutorial
after measuring the shoulder to waist height of your deities, double it so that each fabric strip will fold tidily over each shoulder. Hem both all the way around as needed.
How to make murti clothes for Nitai Gaur shirts
Once you have hemmed each strip of fabric, create pleats in the centre so that the neckline is narrower. Stitch across your pleats to secure them in place.
Deity garment tutorial
Now leaving enough room for the arm to pass through the hole and the top to sit around the shoulder, carefully overlap the fabric and stitch down, securing each strip of fabric into a half of the top
Deity Clothes DIY top tutorial for SEVA Vaishnava devotees of Krishna
Inside out, note the seams and stitching so you can understand how to do it.
Deity Murti top tutorial for sewing for your deities
Turn the tops in the right way and test on your deities. These little sleeveless vests can be pulled together tightly for warmth, and belted, or they can be left open and flowing.
The thai silk I have used for this set actually sits really nicely and is moldable, but I have also made versions where I have put velcro at the back so it closes securely.
gauranitai murti diy tutorial deity clothes
The finished garment set with little tunic tops


For more DIY deity tutorials browse through these posts.

I posted this set off, so couldn’t share a photo of them on.

This was the first type of top I made for my own deities, and it really is the foundation of long sleeve top patterns I will plan to share later on.

Try it in light fabrics! Add braid, add trims, have fun, and share your pics I would LOVE to see your creativity.


Be sure to let me know if my tutorial is lacking, I might have to work on improving it. Hopefully you’ll get the idea of how to construct these easy deity vests.


Posted on Leave a comment

Best tips for DIY sewing deity garments

Krishna deity garment

One of the best hints I can share for sewing deity garments is hemming using the rolled foot!

You can buy an attachment for your sewing machine, if it hasn’t already come with one. I use it on nearly every set of deity clothes that I make – the teeny tiny seams are a dream!

There ARE tricks to using it, and a lot of my friends over the years have asked me to show them to use it, and I would LOVE to do that, but sociable as I am I rarely get out, and it’s hard to find the time – plus, how am I going to help my New York, Vrindavan, or Polish friends? So, this is how my friends, this is how.

This is the original tutorial I learnt from:

One note that I would add, is that you can hold your fabric up and slightly over. You will learn to do this naturally to solve the frustration of unpicking your seams, but hey I’d love to save you from that frustration entirely.
Now that I have just revisited that tutorial I realise that it can actually be used as a trick for curved seams, which someone asked me about today (here, this tip’s for you!)
Ok so you have an EXQUISITE fabric that is ridiculously slippery to sew. One fabric like that is this STUNNING Devore Velvet Silk with peacock pattern that I bought in a fit of enthusiasm, in 3 colors. Seriously, it was almost impossible to sew these into pretty shawls.
So after ruining half my fabric & a lot of research on how to stiffen fabrics which are prone to slide like this beautiful silk I found a LOT of information on using a gelatin bath to temporarily stiffen. Ok- so not going to happen! So While I did have ideas of using Agar-agar I still haven’t tried that. What I used was starch. I starched the fabric heavily, and ironed it dry, and THEN stitched it.
It worked pretty well! Stabilized the fabric enough to get relatively straight seams out of it.
Here’s a tutorial I liked (it’s a video tutorial) on sewing slippery fabrics.
One day I’m going to try the Agar-bath.
Here’s a tip on sewing silk chiffon
This is a great DIY tip on understanding your thread tension on sewing maching. I can’t tell you how often I have been puzzled by this and just fiddled and hoped… But especially if you are trying to stitch using gold thread or switching between sewing heavy weight fabrics and light floaty fabrics, this is essential. I always wreck my tension when I sew deity turbans (because I sew right through stabilising xrays and fabric and quilt wadding!)
Posted on 2 Comments

10 Easy Deity Jewelry Cheats

Krishna Crown easy stretchy bangle

Some jewellery ideas you can buy ready made and use or adapt to ornament your sweet Lords.

There are lots of differently sized deities, my Lord Chaitanya & Lord Nityananda deities are a glorious 53cm base to tip of arms, and I admit I was eager for this size, after years of making fiddly garments for my parents Gaura Nitai deities, who are only around 20cm.

  1. Elasticated rings for bracelets
  2. Stick on bindi earrings – if your deities do not have pierced earholes
  3. Earrings with the plastic earring holder as the stud back are perfect for your deities
  4. Bracelets as crowns – two types which work, stretchy elastic or soft friendship band style bracelets
  5. Ornamental braid crowns (small DIY required in joining the ends together, can be done with a stitch or two, or even sticky tape!)
  6. Bracelets & Anklets necklaces – small fine chains work nicely for this, check the kids section
  7. Adjustable Rings as crowns – particularly lovely around a bun, or for Radha deity
  8. Clippon earrings are darling to adorn belts, ends of shawls or fix turbans in place
  9. Buy beads by the strand & simply tie the ends of the thread – instant deity necklace
  10. Ribbon can make easy shawls – Lace works particularly nicely & rarely needs hem
bracelets as necklaces, a selection of our faves
Necklaces – fancy ornamental style – you can buy these filigree style necklaces anywhere, perfect for deities necklaces
Expandable rings perfect bangles for deities
soft plastic backs make perfect earring backs for studs
mukut deity jewellery
Anklebells/ Anklets as necklaces or belts
Elastic bracelets as crowns
Clippon earrings can be used charmingly attached to turbans, headbands or belts
Buy beads by the open strand and tie the ends for an instant necklace our favorite pearl necklaces are a simple pre-threaded strand of tiny pearls
Bindi for earrings, rings, jewellery, toe rings are so pretty and easy
Krishna Crown easy stretchy bangle
Krsna wears a soft tied cowherd-boy style bandanna, and using a stretchy bangle to ornament the shawl which is tied with ends out, cowherd boy style. Easy to find these stretchy bracelets at big cheap jewellery places like Lovisa, Dotti, and so on. He wears amber earrings which are secured using the little plastic stud backs which are easy to mold up to the backs of his ears.
Krishna & Balaram easy Deity DIY NO SEW no Crafting ornamental accessories
Smaller 9″ Krishna & Balaram deities wear charming strawberry earrings (childrens section of jewellery store) & little bracelets as necklaces. The gold one Lord Balaram wears is a bracelet, as is the silver diamonte one Krsna wears.
The extra pearl and silver one draped over Lord Balaram is another special delicate bracelet. These are my 8yr olds play deities. I try and let her develop her bond with them whilst only gently guiding!
Lace Shawls deity DIY, and ring crowns.
Krishna deity crown easy DIY tutorial tips and tricks for ornaments and accessories
Krishna’s crown is made from a braided/beaded wristband, with a little tassel attached. He also wears an anklet as a belt. His earrings are amber & his necklace is vintage Indian murti jewellery.
Posted on 5 Comments

DIY dhoti garment for Krsna deity

there are lots of different styles of deity garments (of course for different deities too! Krsna & Radha /Krsna Balaram/ Gaur’s Nitai/ Jaganath deities.. this tutorial is for a pleated dhoti which passes between the legs to secure at the back of the waistband. You’ll need to make sure that your deities have enough gap between their legs to pass up the back pleat of the dhoti.

Krsna-diy-tutorial-dhoti Krsna
Deity form needs gap between legs to pass up dhoti back pleat

I really hope that this tutorial will assist you in making your own deity garments. It is geared at beginners who have some sewing experience, as I don’t think I’m practical enough to do a tutorial while I teach you to sew! I’m personally fairly disorganized and love to have a pattern to copy, I don’t think I even have my deities measurements written down anywhere because I always have a big overflowing basket of their laundry I can just pull a sample garment from, and I have my favorites.

You can watch a few more DIY tips if you want some ideas about the various methods I use to create this simple dhoti pattern. View here.

There’s so many styles and they all give such a different vibe! People have preferences for different lengths/ fabrics/ you name it! Right now I love lots of summery bright colors, simple braids, and abundant fresh flowers. In summer time I have some nice just below the knee length dhoti for my Nitai Gaur deities, but they also have some longer just above the ankle length dhotis.

Making garments for your deities is such an adventure. Most of the early sets I made for my deities prior to installation I no longer dress them in – lately their garments are uber-simple, sometimes even without braid, simple, cool, and so comfortable to wear. Always, always easy to dance in!

Remember you are making these clothes for their pleasure, so even your humble attempts, if not perfect, will be a nice start.

Offer your Lords a mirror to enjoy their own beautiful reflection after you have dressed them 🙂

Before you start:

  • Measure!  You’ll need to measure you deities waist or hip (where you want the dhoti to sit) . Measure the hip to ankle – choose your length at this point.  (You can go anywhere from knee length to ankle).
  • Ok so you have measured, now you can select your fabric
    & I’d like to offer some words of wisdom here: I use mostly fine silk (silk charmeuse) or sometimes very nice polyester or cotton fabric. I’ll do another post on fabric types some other time, but for now please try your first dhoti garment in this style using a very light fine fabric so it drapes nicely and is not difficult to sew. For this tutorial I am using a light-weight cotton, such a pretty print!
  • You might like to make a sample dhoti first, to save special fabric for when you have worked out the perfect sizing. This is a very non-scary way to proceed, especially if you have bought a silk fabric which averages around $20 a metre!

Ready to start:


deity garments, deity clothes, krishna krsna deity
Select suitable fabric, cut with seam allowance
krsna-deity-dhoti
pleat a fine set of pleats in the front, to see how much pleat allowance you will have, on top of your waist measurement
diy krsna deity clothes deity garments krishna craft tutorial
Judicious use of pins while you work out the appropriate length
krishna deity garments diy tutorial
Test on Krsna remove the excess fabric which is not needed to make the pleat at back

krsna dhoti deity garment pattern tutorial diy

Back pleats will look like this, and will have a press stud attached to secure

Cutting out your pattern – So generally the overall waistband length will be 1.5 x the waist band length. Allow extra pleats in the front and don’t count on them as part of your waist band measurement. This can vary depending on the curviness of your Lord. If you have your deities right in front of you then that is the easiest way to do it.  Sometimes you may need to add in a pleat to the back to allow for a curvy hip on Krsna or Nitai Gaura deities.


Hem your basic rectangle. I like to use my miracle foot, the seam it gives is as fine as a hand rolled seam could be.

Add on your braid. You may wish to have braid simply down the front, or around the hem. Consider that if the braid is very think it may interfere with the way the fabric hangs.  You can handsew or machine sew the braid dependent on the amount of beadwork on the braid or other factors like time. In general they sit best if hand-stitched but I often sew them on, after accounting for the affect the braid will have on the pleating or the folds of the cloth.


I learned this the hard way!

Note where the pleat side is – it shouldn’t be on the crossed leg it should be on the straight leg side.

Stitch your pleats down, I like to make them fine and stack them in the front, with three pleats.

For fastners, you have a choice – you can either use Velcro (it’s SO easy to put them off and on with velcro and also allows for some room, you can adjust the tightness a little bit, but it will pull the silk if you are using silk, and if you aren’t super organised in your deity garment care it can pull other elements like shawls or other dhoti.  The other option is to use snap fastners – they sell varying sizes of these, and depending on the weight of your fabric you will chose the appropriate size. They’re very time consuming to stitch down, sometimes it takes me just as long to sew on the snaps as hemming and putting together the whole dhoti! Still, they’re long lasting and they won’t damage any garments.

You’ll need to have fastners at the waistband, and one in the middle of the waistband at the back and on the pleat that passes between the legs and snaps on at the back.

Completed Krsna dhoti!
You can tuck the pleats between his legs a little. On the deity, please create the pleat on the leg which will be straight, so that it can tuck tidily between his legs and the other crossed leg has the section which will pass between his legs and up the back to pin at the back.

things to be careful of:

  1. position your press studs in the right spots like don’t get confused on the inside & outside – if you check the end of the video you’ll notice I stitched the button on the back pleat on the wrong side!
  2. Pleats! I can’t over emphasize this – pleat side should be on the straight leg so it can tuck between the bent leg on Krsna. It doesn’t matter so much on deities of Lord Chaitanya & Lord Nityananda, as their standing postures can vary.
  3. keep it easy! Use a rolled foot on the sewing machine to hem.
  4. Beading needles work best for stitching on the press studs
Dressed in His Breezy new dhoti