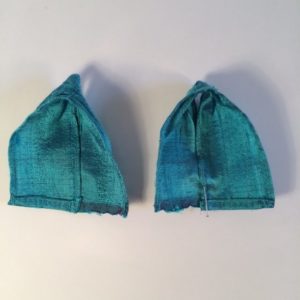
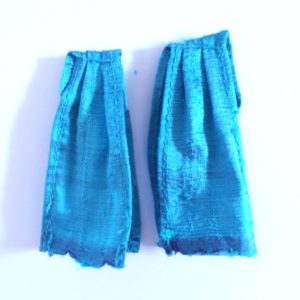
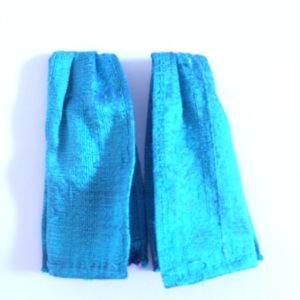
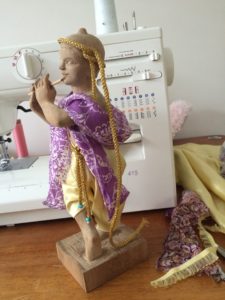
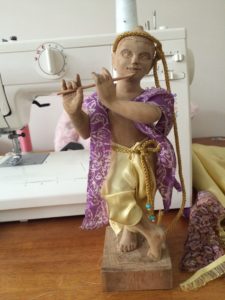
Following on from my first HOW TO MAKE A DHOTI FOR KRISHNA post, I have put together a very simple guide, with some ideas and explanations about the reasons for pleating, and how and where to pleat.
This really is the worlds easiest dhoti… or maybe I should say, realistic dhoti, after all there are some dhoti which are just a sarong and that is probably easier style.
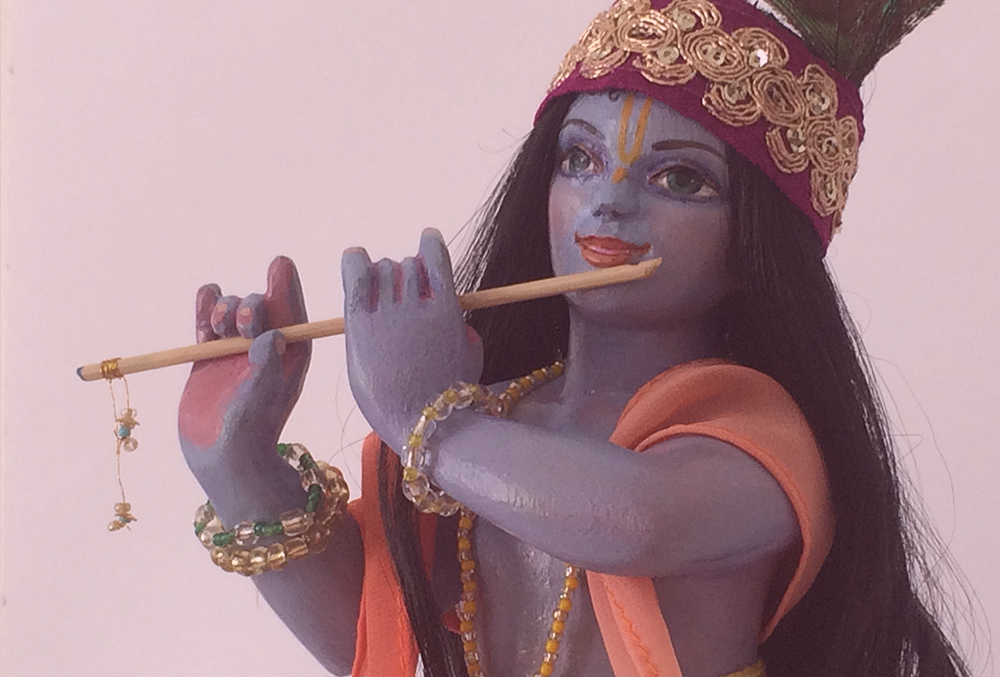
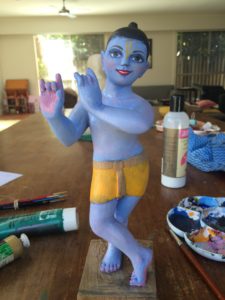
It’s also extra fun because I have temporarily in my custody this beautiful Krishna deity I painted! Isn’t He lovely? Syamasundar Krishna in all joyous happy beauty. (If you are painting deities then please check out my tips on painting deity forms)
As long as you know how to sew and hem a simple rectangle, then this DIY tutorial is all you need to get started on making your own clothes for Krsna! If you have your deity standing in front of you then you can easily work out the length you need to cut.
I love it if I have Krsna in front of me it makes sewing for Him SO much easier! In general I would allow 1/2 of waist width for the front pleats, 3cm extra for the back pleat, and then 1.5 times waist width for the length to pass between Krishna legs and fold into the back of his dhoti at the back.
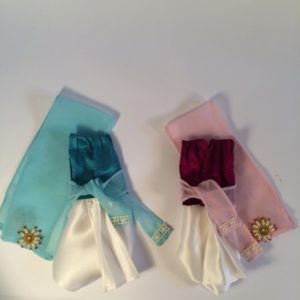
Always sew on your braid before you do your final stitches to secure the ends and add your press studs!
If anything in this tutorial is unclear, please refer to my step-by-step tutorial which is detailed with images! Here’s that link again
There’s a whole catalogue of Krishna videos on my YouTube channel which you may or may not follow – not everything makes it’s way to my blog, we’ve diversified across social media platforms, hah! Please subscribe and follow me on YouTube & Facebook! I promise to keep it Krishna conscious! I don’t promise not to totally obsess over art, Krishna, deities, and more 🙂
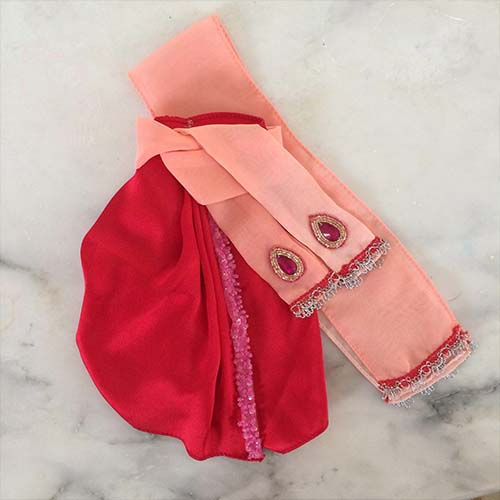
Summer is so easy! Just lovely breezy dhoti & nice light shawls. Once winter rolls around I start wishing I had more shirts for my dear Lords, so I have come up with a really simple shirt option.
This set is basically a sleeveless vest option and there are a variety of fabrics you can experiment with.
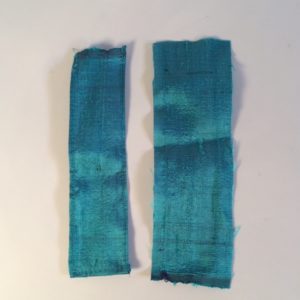
For this tutorial I used quite a flexible but heavy thai shot silk fabric (given to me by a very dear friend, thank you!).
I have also made longer looser versions in a sheer fabric which look really lovely on, they work really well and nicely, almost like flowy shawls.
The beauty of this pattern is it’s ease. It suits a beginner skill level, and there are no tricky sleeve insets in sight!
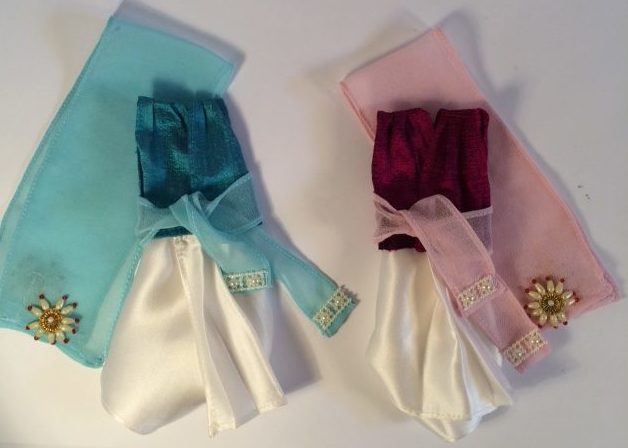
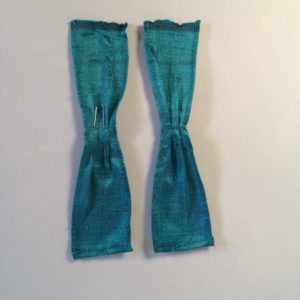
after measuring the shoulder to waist height of your deities, double it so that each fabric strip will fold tidily over each shoulder. Hem both all the way around as needed.Once you have hemmed each strip of fabric, create pleats in the centre so that the neckline is narrower. Stitch across your pleats to secure them in place.Now leaving enough room for the arm to pass through the hole and the top to sit around the shoulder, carefully overlap the fabric and stitch down, securing each strip of fabric into a half of the topInside out, note the seams and stitching so you can understand how to do it.Turn the tops in the right way and test on your deities. These little sleeveless vests can be pulled together tightly for warmth, and belted, or they can be left open and flowing. The thai silk I have used for this set actually sits really nicely and is moldable, but I have also made versions where I have put velcro at the back so it closes securely.The finished garment set with little tunic tops
I posted this set off, so couldn’t share a photo of them on.
This was the first type of top I made for my own deities, and it really is the foundation of long sleeve top patterns I will plan to share later on.
Try it in light fabrics! Add braid, add trims, have fun, and share your pics I would LOVE to see your creativity.
Be sure to let me know if my tutorial is lacking, I might have to work on improving it. Hopefully you’ll get the idea of how to construct these easy deity vests.
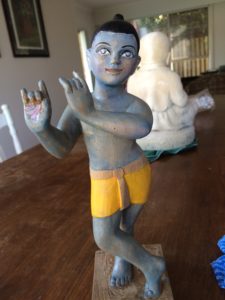
It’s no secret that Krsna is our hero… He’s just so all-attractive! When I was lucky enough to be asked to paint this beautiful Krsna deity hand carved by an incredibly talented artist it was pretty exciting.
this isn’t an amazing diy tutorial, more of a rough process documentation!
Because, you know, like all artists I’m also insecure it took me a while and Krishna had some repaints.. I canvassed the opinion of every visitor while being coy about the progress on my personal online diary (ok I mean instagram).
There’s nothing quite as exciting as painting a Krsna statue or Deity. I don’t know if there’s anything else as daunting either!
carved Krishna deity
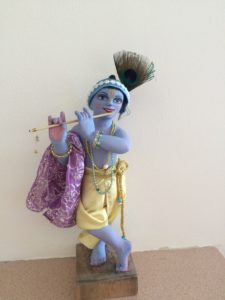
Decorated with peacock feather flute and some necklaces Krsna s so cute
So from the start (no I didn’t prime – why? Coz the paint dries faster and first off I was planning to leave all that beautiful wood showing through.. I soon decided against that, and there was a scary dark blue stage (not shared) which got painted over…
“What do you think of this? Does He look good?”
Well I kinda had a lovely friend over, and we decided I need to improve him. You must be crazy! Agreed. Totally bonkers.
He was pretty much perfect except a tiny detail of his eyes…
So of course when I repainted him I did one thing and another and ended up with a full repaint virtually.
When you blend your own skin color it’s probably a good idea to save some of that paint blend (for acrylics you can put plastic wrap over it & refrigerate to save it).
Painting deities is a huge commitment, a really big deal undertaking. Personally I love painting Krsna deities so much as a meditation on Krsna that all the time and tears are forgotten afterwards.
Start painting a wooden statue of Krsna straight away:
Acrylic paints
tiniest paint brushes you can. Buy. Order them online if you can’t find them small enough. It’s critical to get tiny eye details. As a note on paintbrushes quality matters. I have found Windsor newton brushes the most reliable because the paintbrush hairs don’t split off. You pay about $10 per brush so you really don’t want it to fray on you after a week of use.
Lots of time
Reference picture of Krsna is always a plus! I had a beautiful picture of murli I was looking at but then really that beautiful pic of Krsna bringing water to his devotee.. I’ll try & find a pic to show.
If necessary you can lightly sand the wood. The nicest surface will be completely smooth. You may have the opposite problem and need to actually strip a clear varnish off the wood, if you have bought a Krsna deity who has been heavily varnished. “forget perfection just aim for the best you can do” Seriously you could do this for years if you chase the dream of perfection. Krsna is so sweet He is a delight to look at, even if you’re not the worlds most talented artist (or anywhere close).
Decide if you are going to completely paint the wooden Krsna deity/ statue or if you are going to leave some of the wood shining through (I do really like that look, it’s beautiful, you see it in a lot of Christmas natural carved statues).
Lay down the base skin coat first. You may need a couple of layers to acheive the depth and brilliance you like. My favorite shade of blue (coastal blue) is so watery and thin I think it takes about 5 coats before it looks good.
Adorable but shiny
Allow decent drying times!
If you’re antsy like me you can use a heat gun. Pure genius.
Next work on your eyes, for me I feel like painting Krishna’s eyes is super important to get them done asap, it informs everything else, the angle of His smile, the cheek coloration, etc etc.
Then it’s open slater anything goes do whatever area you like.
After that I would start laying in any shading or colors you want, I love to make Krsna look all fresh and youthfully innocent, like He’s just about to run off and play with the cowherd boys or girls.
Next paint in his lips/ features/ hair.
Once dry and you have made any required corrections lacquer using a polyurethane varnish but be careful!Two coats might cause him to have a sheen. I wasn’t thrilled when this Krsna developed a glossy look after two coats of lacquer, totally my fault for not testing enough. I have three bottles of Jo Sonja lacquer and I always forget which does what. Think I’d better label them with notes!
*I am not an expert I’m an enthusiast! I still learn as I go (ergo the total repaint which all to often occurs!) So please, use common sense and if you can think of a better way to do something, or a step I’ve missed in the process, then you should do that.