Posted on 11 Comments

Choosing a Krishna Deity

Youthful krishna deity dressed sweetly in flowers from the forest playing his flute on a ornate pink background

I have long admired the Krishna deities which my friends and family have worshipped.

Krishna has so many different moods!

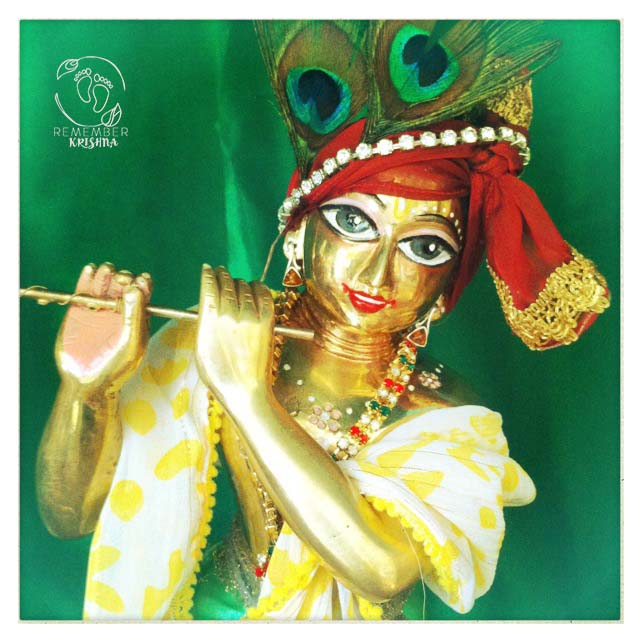
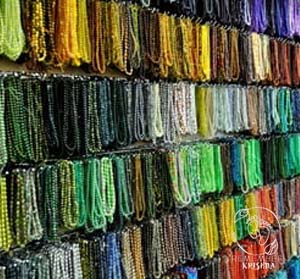
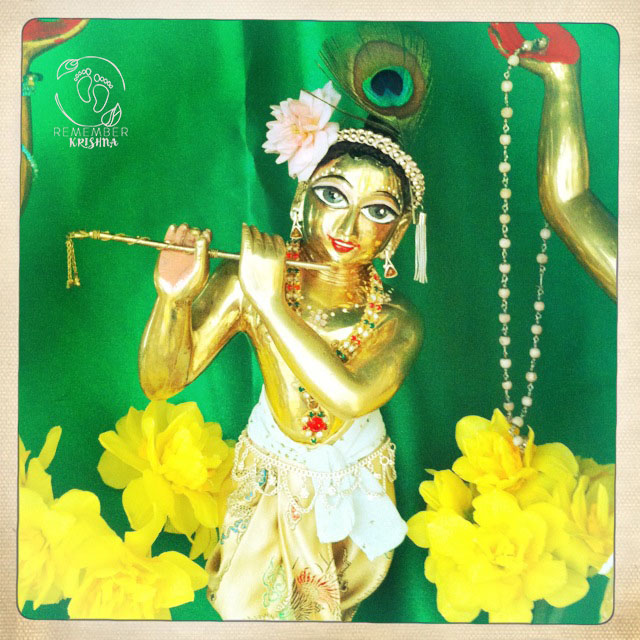
We know that, looking at a deity of Krishna it doesn’t matter from what His form is created. Be it carved wood, formed clay, poured metal or crafted marble – Krishna is so captivating and beautiful that it is His form and transcendental loveliness which prevails. The way in which He captures His dear devotees and accepts their worship is always different. In His adornments, the decorations He wears and the look in His eyes – dreamy, naughty, reassuring, loving, mirthful, reassuring – it’s all there when you begin a relationship with Krishna in His deity form!

But it’s kinda hard to commit to a purchase of a Krishna statue, before you begin worshiping Him.

krishna syamasundar deity with red garland, peacock feather black syamasundar marble deity formAfter so much wonder and bliss and attraction to so very many different deities, I am personally dithering and have been for years – dark Krishna or light Krishna? Because really… it doesn’t matter, it’s just KRISHNA I want!

White marble krishna deity radha kauai deity dressed beautiful garments from remember krishna silk dhoti and garments
Radha’s Krishna deity

But even so, I’ve been looking and looking at deities, thinking, I would really like Krishna to look after here, to make Him garlands and clothes and rest my eyes on Him as I chant japa and sing to my Lords.. or like I used to, have Him with me as I work ready to bedazzle my eyes and capture my heart.

deity on my work desk with little photo frames Krishna deity while I work looking lovingly at me
Krishna used to be with me like this, standing at my desk with me all day long. It was so nice! He has gone now, as He was just on a long term babysitting.

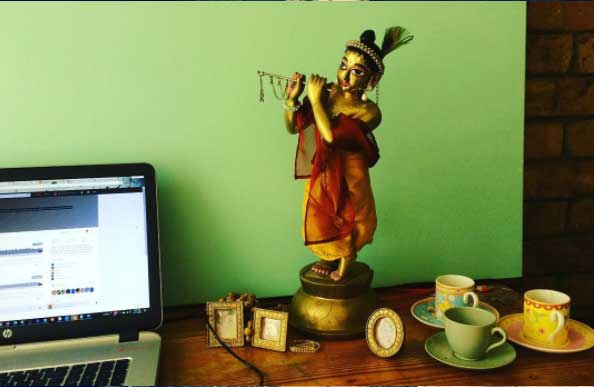
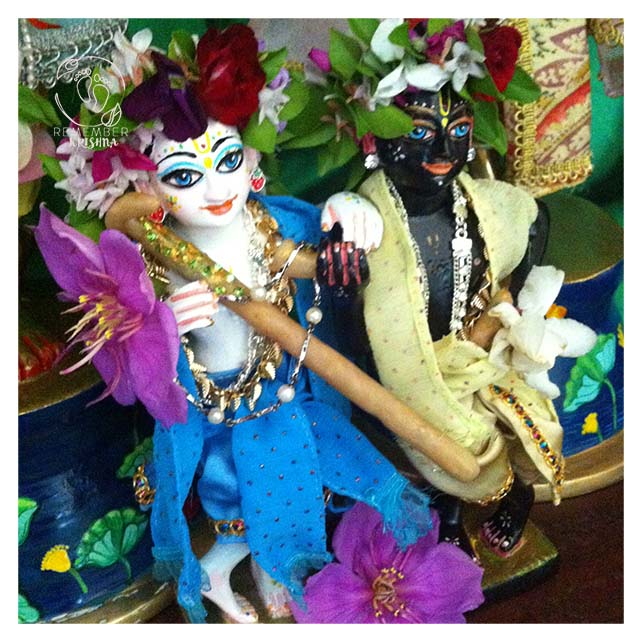
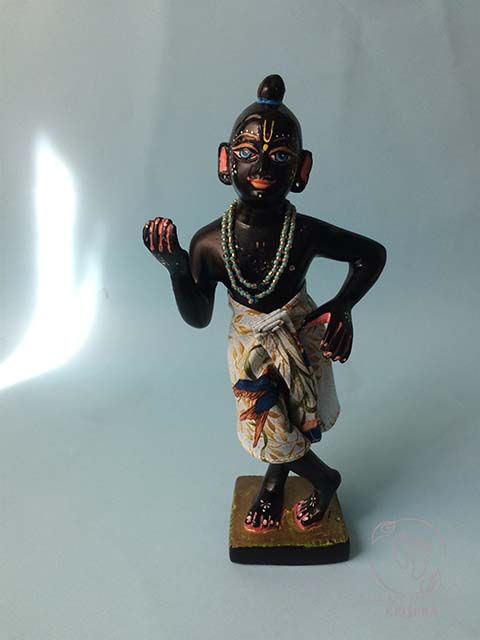
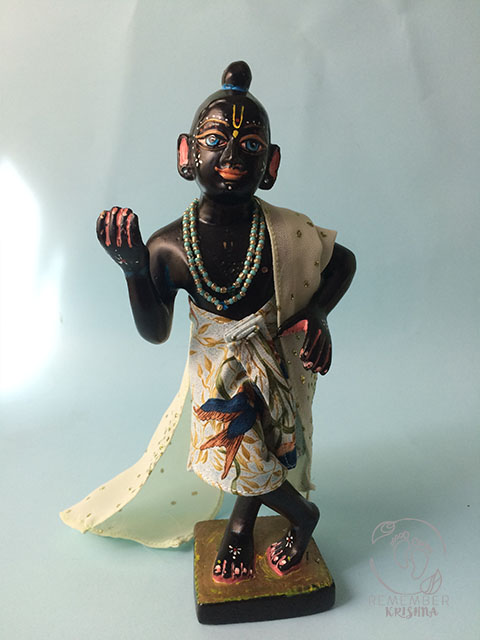
It’s this ever-going-around circle in my head. This morning I looked at the deity of Krishna I have recently painted – a black soapstone Krishna, who was imperfectly carved, but now, He is just so CHARMING! And if He were mine I know that I wouldn’t change Him for any other! He has this very JOYFUL and HAPPY look (which is just so perfect for the bubbly devotee who will be taking Him home) and it was such a delightful flash of perception. Krishna is Krishna. He will inhabit a deity form and the color texture quality etc are all immaterial because… it’s Krishna! He is above the material considerations and will sneak in and steal our hearts.

So – do I know whether I want a black marble Krishna or a white marble Krishna now? Yes. Black or white (light blue I should say) either way I am happy.

Krishna deity in white marble with flute, peacock feather and effulgence

Now its all about looking for Krishna at the right age. What’s the right age? Any age of Krishna! I’m kind of joking, but I do think that Krishna makes His own arrangements that He comes to you just as He should.

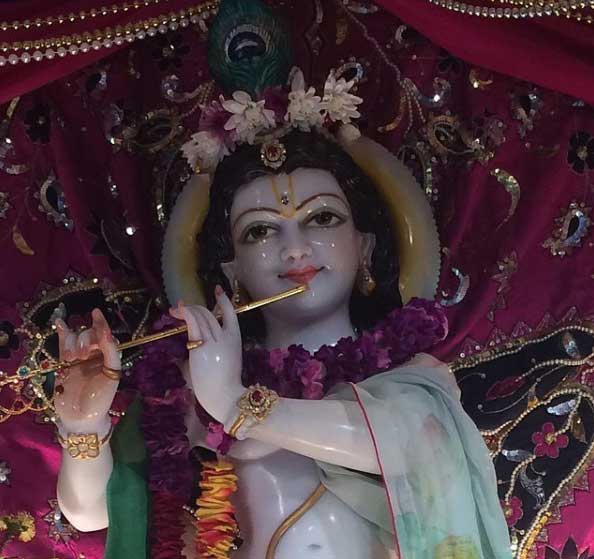
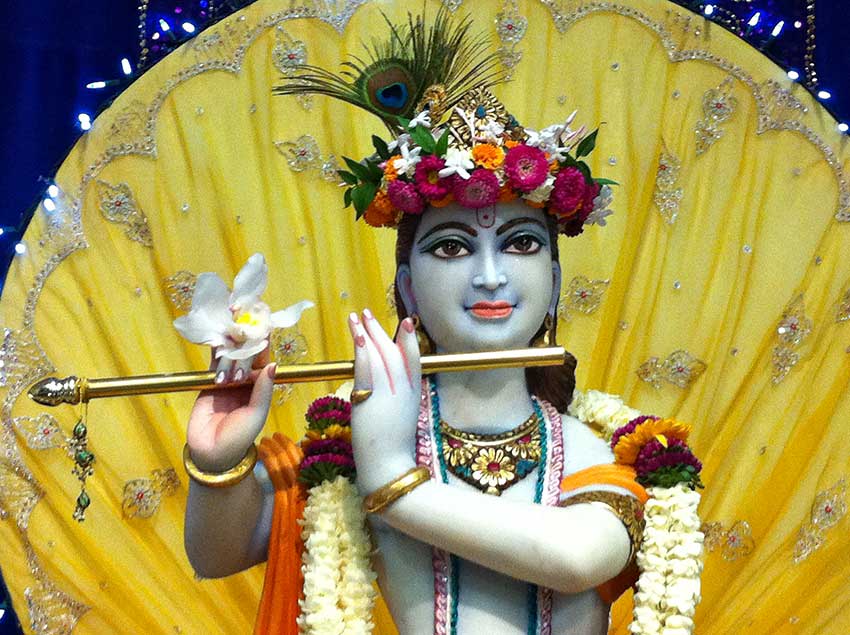
Look at youthful and blushing Krsna here: Youthful krishna deity dressed sweetly in flowers from the forest playing his flute on a ornate pink background

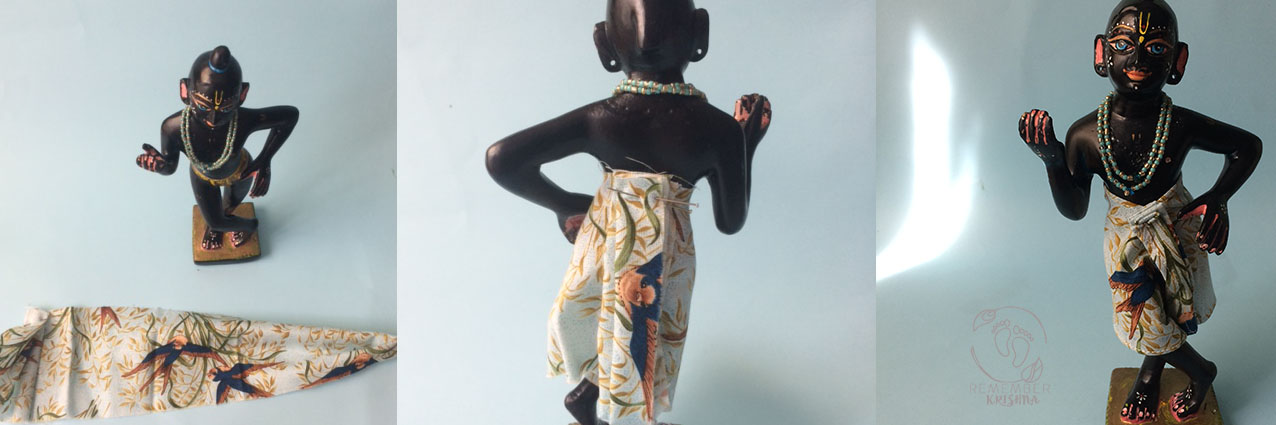
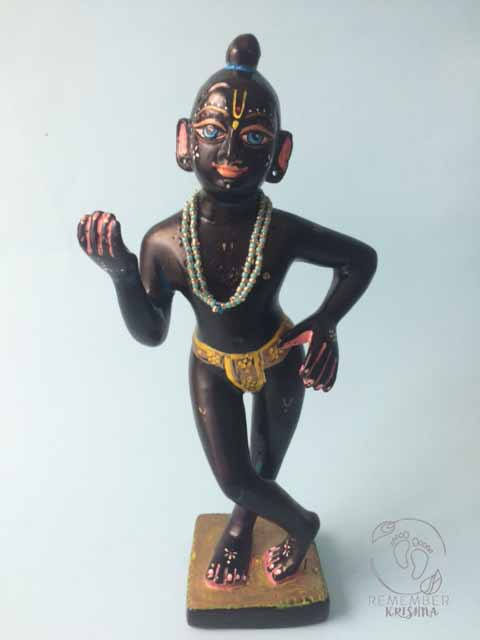
The mistake I don’t want to make again:

When I ordered my own dear Nitai Gaura deities, I had ordered the exact same deities that my sister has. (My sisters deities are SO SO SWEET!) Her Gaura Nitai deities have these meek and mild faces, so far removed from looking at the world, but focused on Krishna, and this dainty posture, arms raised high.. Oh I just LOVE them!

So I placed an order, with the same supplier, for these deities. But then, to my consternation, the supplier sent back a picture of the deities they were sending. I wailed and woe’d! It was absolutely NOT a set from the same mold. They were different in a zillion ways. I tried again –  I emailed back and said – “NO! These are NOT the deities I want.” And I resent the picture of my sister’s Lords, pointing out the differences. OK – next I got a pic back (of the same deities) with painted base to mimic the bases on my sister deities, and painted faces… Oh, so not the point!… So I gave up, and said ok, well, if that’s what you are sending me what can I do.

And then. They arrived.

Nitai Gaur deities sita's lords raised arms chanting and dancing deities beautifully dressed and decorated with flowers and wigs

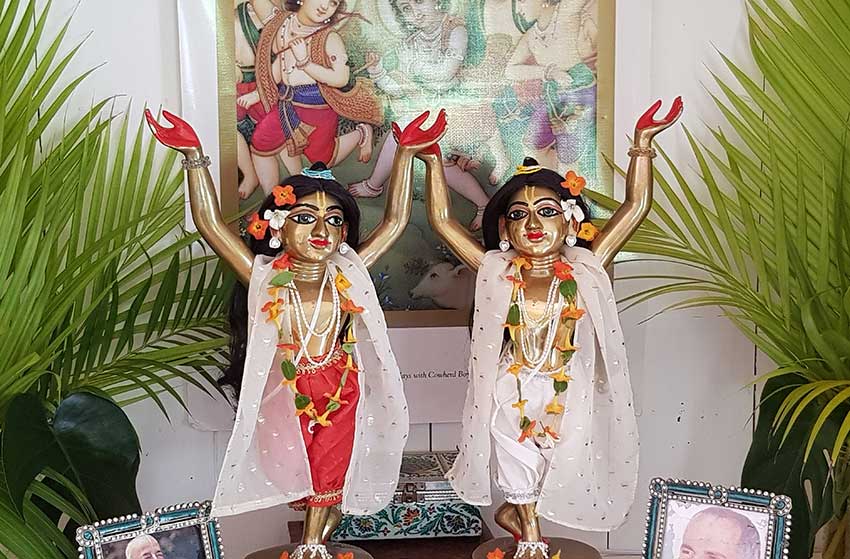
The minute I cracked open the box (they arrived in this massive crate! So well packed and stored, and it was obvious this Immense TREASURE had arrived on my doorstep! So the minute I opened the box and before I had even untied them and lifted them out, I had lost my heart. I cried out of happiness and wonder. Krishna had chosen how to come to me and They were perfect. I have to laugh about it now, that I thought I knew best.

Krishna knows how you want to relate to Him. He knows your heart.

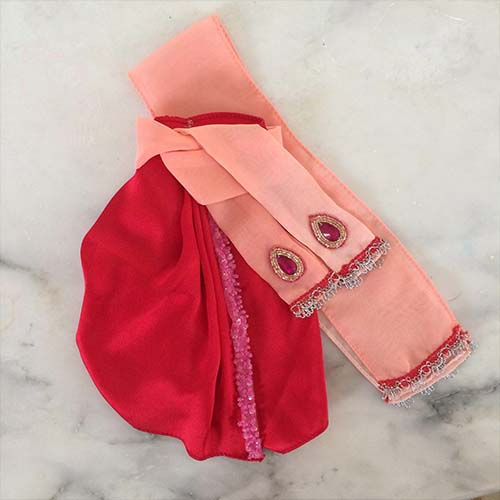
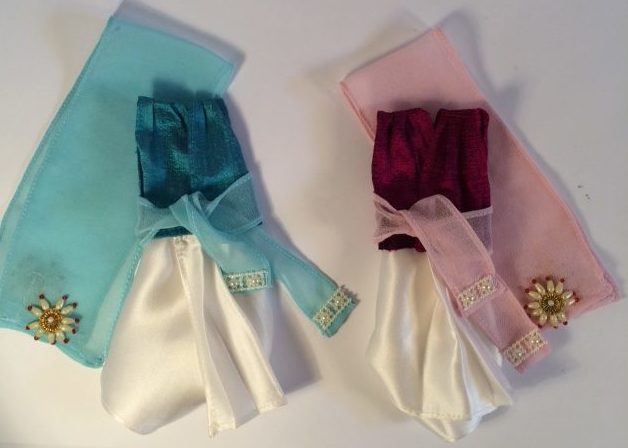
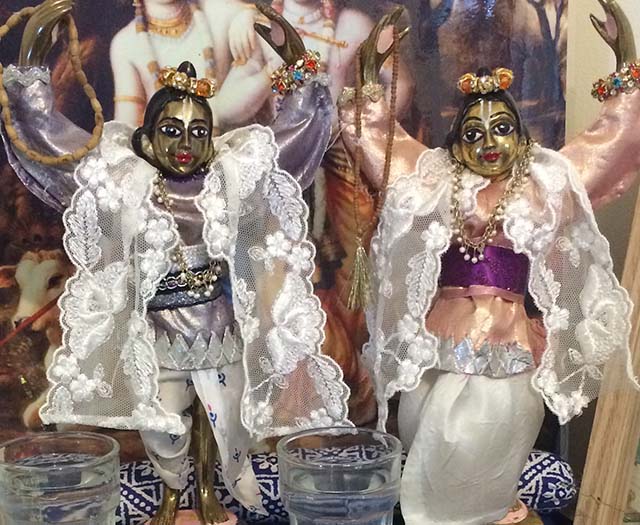
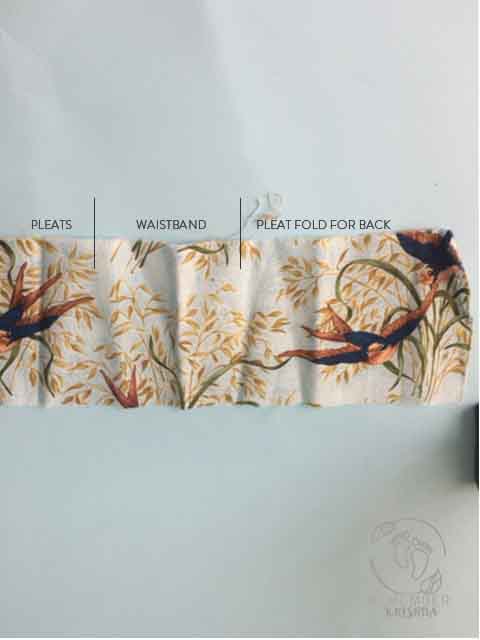
My deities have this amazing welcoming presence. They have wide open hearts and arms open welcoming and lifted up as they dance. They have very curved dancing hips and one foot is lifted off the ground – They are dancing all the time, and I dress Them in clothes that won’t get in the way of Their transcendental dancing. Their eyes are big and lustrous, They have beautiful smiles that are at once grave and happy, and to see them is to see how They invite us into the spiritual world.

Worshipping Lord Chaitanya and Lord Nityananda deities is so nice; we develop the mood of service. If I’m lazy out of bed or lazy to cook dinner I remember that I haven’t woken up my Lords or offered them food, actually it keeps me more regulated! And I worry about them, while I am cooking, if they will like it and try and keep the mood of cooking it nice. Mostly I’m super lazy, so it helps to have this little prompting!

When my parents took care of my Nitai Gaura while I was away for a week, years ago, here’s my Lords with their Lords:

nitai gaur deities in two sizes, small gaura nitai large nitai gaur deities both beautiful

My parents  darling Lord Chaitanya and Lord Nityananda deities, but they love to come and visit my Lords and offer worship with kirtan.

If you think you might like to order the same set (haha!) you can contact me to get the name of the supplier!

Read my blog about different types of deity forms that may work for your family -:How to choose a Krishna murti for Family Life

Posted on Leave a comment

Easiest dhoti in the world for Krishna deity

Following on from my first HOW TO MAKE A DHOTI FOR KRISHNA post, I have put together a very simple guide, with some ideas and explanations about the reasons for pleating, and how and where to pleat.

This really is the worlds easiest dhoti… or maybe I should say, realistic dhoti, after all there are some dhoti which are just a sarong and that is probably easier style.

It’s also extra fun because I have temporarily in my custody this beautiful Krishna deity I painted! Isn’t He lovely? Syamasundar Krishna in all joyous happy beauty. (If you are painting deities then please check out my tips on painting deity forms)

As long as you know how to sew and hem a simple rectangle, then this DIY tutorial is all you need to get started on making your own clothes for Krsna! If you have your deity standing in front of you then you can easily work out the length you need to cut.

I love it if I have Krsna in front of me it makes sewing for Him SO much easier! In general I would allow 1/2 of waist width for the front pleats, 3cm extra for the back pleat, and then 1.5 times waist width for the length to pass between Krishna legs and fold into the back of his dhoti at the back.

Always sew on your braid before you do your final stitches to secure the ends and add your press studs!

If anything in this tutorial is unclear, please refer to my step-by-step tutorial which is detailed with images! Here’s that link again 

There’s a whole catalogue of Krishna videos on my YouTube channel which you may or may not follow – not everything makes it’s way to my blog, we’ve diversified across social media platforms, hah! Please subscribe and follow me on YouTube & Facebook! I promise to keep it Krishna conscious! I don’t promise not to totally obsess over art, Krishna, deities, and more 🙂


Posted on Leave a comment

Easy vest DIY tutorial for Nitai Gaur or Krishna deities

gauranitai murti diy tutorial deity clothes

Summer is so easy! Just lovely breezy dhoti & nice light shawls. Once winter rolls around I start wishing I had more shirts for my dear Lords, so I have come up with a really simple shirt option.

This set is basically a sleeveless vest option and there are a variety of fabrics you can experiment with.

For this tutorial I used quite a flexible but heavy thai shot silk fabric (given to me by a very dear friend, thank you!).

I have also made longer looser versions in a sheer fabric which look really lovely on, they work really well and nicely, almost like flowy shawls.

The beauty of this pattern is it’s ease. It suits a beginner skill level, and there are no tricky sleeve insets in sight!

DIY sewing deity tutorial
after measuring the shoulder to waist height of your deities, double it so that each fabric strip will fold tidily over each shoulder. Hem both all the way around as needed.
How to make murti clothes for Nitai Gaur shirts
Once you have hemmed each strip of fabric, create pleats in the centre so that the neckline is narrower. Stitch across your pleats to secure them in place.
Deity garment tutorial
Now leaving enough room for the arm to pass through the hole and the top to sit around the shoulder, carefully overlap the fabric and stitch down, securing each strip of fabric into a half of the top
Deity Clothes DIY top tutorial for SEVA Vaishnava devotees of Krishna
Inside out, note the seams and stitching so you can understand how to do it.
Deity Murti top tutorial for sewing for your deities
Turn the tops in the right way and test on your deities. These little sleeveless vests can be pulled together tightly for warmth, and belted, or they can be left open and flowing.
The thai silk I have used for this set actually sits really nicely and is moldable, but I have also made versions where I have put velcro at the back so it closes securely.
gauranitai murti diy tutorial deity clothes
The finished garment set with little tunic tops


For more DIY deity tutorials browse through these posts.

I posted this set off, so couldn’t share a photo of them on.

This was the first type of top I made for my own deities, and it really is the foundation of long sleeve top patterns I will plan to share later on.

Try it in light fabrics! Add braid, add trims, have fun, and share your pics I would LOVE to see your creativity.


Be sure to let me know if my tutorial is lacking, I might have to work on improving it. Hopefully you’ll get the idea of how to construct these easy deity vests.


Posted on 2 Comments

10 Easy Deity Jewelry Cheats

Krishna Crown easy stretchy bangle

Some jewellery ideas you can buy ready made and use or adapt to ornament your sweet Lords.

There are lots of differently sized deities, my Lord Chaitanya & Lord Nityananda deities are a glorious 53cm base to tip of arms, and I admit I was eager for this size, after years of making fiddly garments for my parents Gaura Nitai deities, who are only around 20cm.

  1. Elasticated rings for bracelets
  2. Stick on bindi earrings – if your deities do not have pierced earholes
  3. Earrings with the plastic earring holder as the stud back are perfect for your deities
  4. Bracelets as crowns – two types which work, stretchy elastic or soft friendship band style bracelets
  5. Ornamental braid crowns (small DIY required in joining the ends together, can be done with a stitch or two, or even sticky tape!)
  6. Bracelets & Anklets necklaces – small fine chains work nicely for this, check the kids section
  7. Adjustable Rings as crowns – particularly lovely around a bun, or for Radha deity
  8. Clippon earrings are darling to adorn belts, ends of shawls or fix turbans in place
  9. Buy beads by the strand & simply tie the ends of the thread – instant deity necklace
  10. Ribbon can make easy shawls – Lace works particularly nicely & rarely needs hem
bracelets as necklaces, a selection of our faves
Necklaces – fancy ornamental style – you can buy these filigree style necklaces anywhere, perfect for deities necklaces
Expandable rings perfect bangles for deities
soft plastic backs make perfect earring backs for studs
mukut deity jewellery
Anklebells/ Anklets as necklaces or belts
Elastic bracelets as crowns
Clippon earrings can be used charmingly attached to turbans, headbands or belts
Buy beads by the open strand and tie the ends for an instant necklace our favorite pearl necklaces are a simple pre-threaded strand of tiny pearls
Bindi for earrings, rings, jewellery, toe rings are so pretty and easy
Krishna Crown easy stretchy bangle
Krsna wears a soft tied cowherd-boy style bandanna, and using a stretchy bangle to ornament the shawl which is tied with ends out, cowherd boy style. Easy to find these stretchy bracelets at big cheap jewellery places like Lovisa, Dotti, and so on. He wears amber earrings which are secured using the little plastic stud backs which are easy to mold up to the backs of his ears.
Krishna & Balaram easy Deity DIY NO SEW no Crafting ornamental accessories
Smaller 9″ Krishna & Balaram deities wear charming strawberry earrings (childrens section of jewellery store) & little bracelets as necklaces. The gold one Lord Balaram wears is a bracelet, as is the silver diamonte one Krsna wears.
The extra pearl and silver one draped over Lord Balaram is another special delicate bracelet. These are my 8yr olds play deities. I try and let her develop her bond with them whilst only gently guiding!
Lace Shawls deity DIY, and ring crowns.
Krishna deity crown easy DIY tutorial tips and tricks for ornaments and accessories
Krishna’s crown is made from a braided/beaded wristband, with a little tassel attached. He also wears an anklet as a belt. His earrings are amber & his necklace is vintage Indian murti jewellery.
Posted on 5 Comments

DIY dhoti garment for Krsna deity

there are lots of different styles of deity garments (of course for different deities too! Krsna & Radha /Krsna Balaram/ Gaur’s Nitai/ Jaganath deities.. this tutorial is for a pleated dhoti which passes between the legs to secure at the back of the waistband. You’ll need to make sure that your deities have enough gap between their legs to pass up the back pleat of the dhoti.

Krsna-diy-tutorial-dhoti Krsna
Deity form needs gap between legs to pass up dhoti back pleat

I really hope that this tutorial will assist you in making your own deity garments. It is geared at beginners who have some sewing experience, as I don’t think I’m practical enough to do a tutorial while I teach you to sew! I’m personally fairly disorganized and love to have a pattern to copy, I don’t think I even have my deities measurements written down anywhere because I always have a big overflowing basket of their laundry I can just pull a sample garment from, and I have my favorites.

You can watch a few more DIY tips if you want some ideas about the various methods I use to create this simple dhoti pattern. View here.

There’s so many styles and they all give such a different vibe! People have preferences for different lengths/ fabrics/ you name it! Right now I love lots of summery bright colors, simple braids, and abundant fresh flowers. In summer time I have some nice just below the knee length dhoti for my Nitai Gaur deities, but they also have some longer just above the ankle length dhotis.

Making garments for your deities is such an adventure. Most of the early sets I made for my deities prior to installation I no longer dress them in – lately their garments are uber-simple, sometimes even without braid, simple, cool, and so comfortable to wear. Always, always easy to dance in!

Remember you are making these clothes for their pleasure, so even your humble attempts, if not perfect, will be a nice start.

Offer your Lords a mirror to enjoy their own beautiful reflection after you have dressed them 🙂

Before you start:

  • Measure!  You’ll need to measure you deities waist or hip (where you want the dhoti to sit) . Measure the hip to ankle – choose your length at this point.  (You can go anywhere from knee length to ankle).
  • Ok so you have measured, now you can select your fabric
    & I’d like to offer some words of wisdom here: I use mostly fine silk (silk charmeuse) or sometimes very nice polyester or cotton fabric. I’ll do another post on fabric types some other time, but for now please try your first dhoti garment in this style using a very light fine fabric so it drapes nicely and is not difficult to sew. For this tutorial I am using a light-weight cotton, such a pretty print!
  • You might like to make a sample dhoti first, to save special fabric for when you have worked out the perfect sizing. This is a very non-scary way to proceed, especially if you have bought a silk fabric which averages around $20 a metre!

Ready to start:


deity garments, deity clothes, krishna krsna deity
Select suitable fabric, cut with seam allowance
krsna-deity-dhoti
pleat a fine set of pleats in the front, to see how much pleat allowance you will have, on top of your waist measurement
diy krsna deity clothes deity garments krishna craft tutorial
Judicious use of pins while you work out the appropriate length
krishna deity garments diy tutorial
Test on Krsna remove the excess fabric which is not needed to make the pleat at back

krsna dhoti deity garment pattern tutorial diy

Back pleats will look like this, and will have a press stud attached to secure

Cutting out your pattern – So generally the overall waistband length will be 1.5 x the waist band length. Allow extra pleats in the front and don’t count on them as part of your waist band measurement. This can vary depending on the curviness of your Lord. If you have your deities right in front of you then that is the easiest way to do it.  Sometimes you may need to add in a pleat to the back to allow for a curvy hip on Krsna or Nitai Gaura deities.


Hem your basic rectangle. I like to use my miracle foot, the seam it gives is as fine as a hand rolled seam could be.

Add on your braid. You may wish to have braid simply down the front, or around the hem. Consider that if the braid is very think it may interfere with the way the fabric hangs.  You can handsew or machine sew the braid dependent on the amount of beadwork on the braid or other factors like time. In general they sit best if hand-stitched but I often sew them on, after accounting for the affect the braid will have on the pleating or the folds of the cloth.


I learned this the hard way!

Note where the pleat side is – it shouldn’t be on the crossed leg it should be on the straight leg side.

Stitch your pleats down, I like to make them fine and stack them in the front, with three pleats.

For fastners, you have a choice – you can either use Velcro (it’s SO easy to put them off and on with velcro and also allows for some room, you can adjust the tightness a little bit, but it will pull the silk if you are using silk, and if you aren’t super organised in your deity garment care it can pull other elements like shawls or other dhoti.  The other option is to use snap fastners – they sell varying sizes of these, and depending on the weight of your fabric you will chose the appropriate size. They’re very time consuming to stitch down, sometimes it takes me just as long to sew on the snaps as hemming and putting together the whole dhoti! Still, they’re long lasting and they won’t damage any garments.

You’ll need to have fastners at the waistband, and one in the middle of the waistband at the back and on the pleat that passes between the legs and snaps on at the back.

Completed Krsna dhoti!
You can tuck the pleats between his legs a little. On the deity, please create the pleat on the leg which will be straight, so that it can tuck tidily between his legs and the other crossed leg has the section which will pass between his legs and up the back to pin at the back.

things to be careful of:

  1. position your press studs in the right spots like don’t get confused on the inside & outside – if you check the end of the video you’ll notice I stitched the button on the back pleat on the wrong side!
  2. Pleats! I can’t over emphasize this – pleat side should be on the straight leg so it can tuck between the bent leg on Krsna. It doesn’t matter so much on deities of Lord Chaitanya & Lord Nityananda, as their standing postures can vary.
  3. keep it easy! Use a rolled foot on the sewing machine to hem.
  4. Beading needles work best for stitching on the press studs
Dressed in His Breezy new dhoti